How to Photograph Children

Let me start by saying I do not formally teach how to photograph children. I enjoy shooting family photography sessions, but photographing children is not something I’d consider myself an expert in.

However, as a professional wedding photographer, I do consider myself to have an adequate, all-round knowledge of most facets of photography, including how to photograph children.

Having 2 sons to practice with helps too of course 🙂

Speaking recently to a mother who was desperate to take some meaningful photos of her kids, I realised that most parents don’t know the first thing about how to take a decent photo of their children.

This post is a selection of tips to help you take better photos of your kids. Many of the tips apply to photographing other subjects too, but let’s focus first on getting some great snaps of the little ones!

If you have any good tips on how to photograph children, feel free to leave them in the comments below so we can all benefit. If photographing babies is more your thing, check out these tips on newborn photography.

29 Tips for Photographing Children

Some of these tips on how to photograph children are technical and others are psychological. As with all portrait photography, getting a compelling image starts with engaging with your subject.

As for the technical tips, I’ve tried to keep the information as beginner-friendly as possible, assuming you have had limited experience with a camera.

If you have any specific questions regarding technique or settings, leave them in the comments below and I’ll do my best to answer.

Tip #1: Get them used to the camera
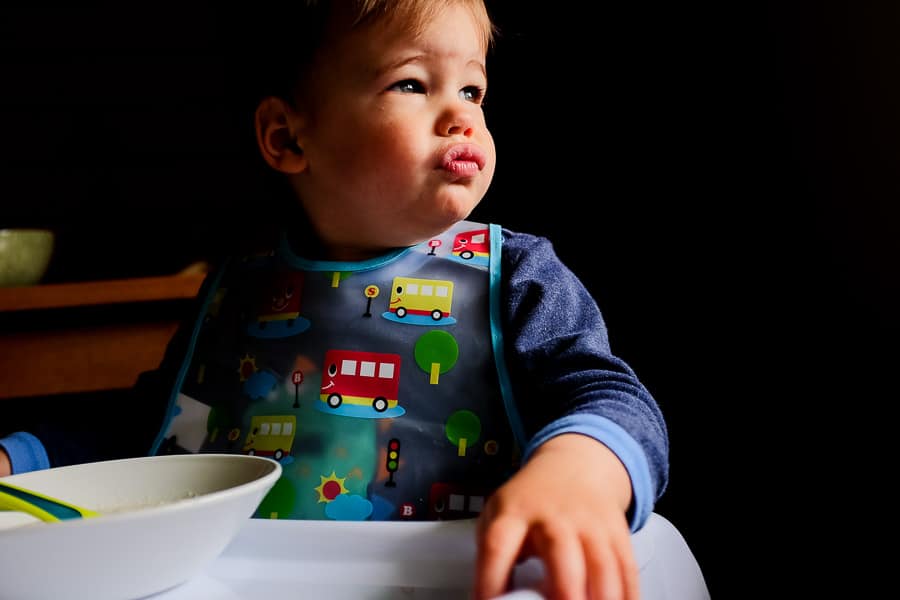
photgraphing children - tips and tricks

Even as an adult, having a camera point at us makes us squirm. So it’s no wonder that the kids start acting unnatural when you point a camera at them.

When photographing children, you need to be persistent and patient, lifting the camera often enough that the kids get used to it.

After a while they should forget it’s there and you’ll have those candid, natural shots that always look the best.

To be able to always have your camera on you, be sure to keep your photography gear light and minimal – put away your travel tripods and spare lenses, and concentrate on using the bare minimum accessories.

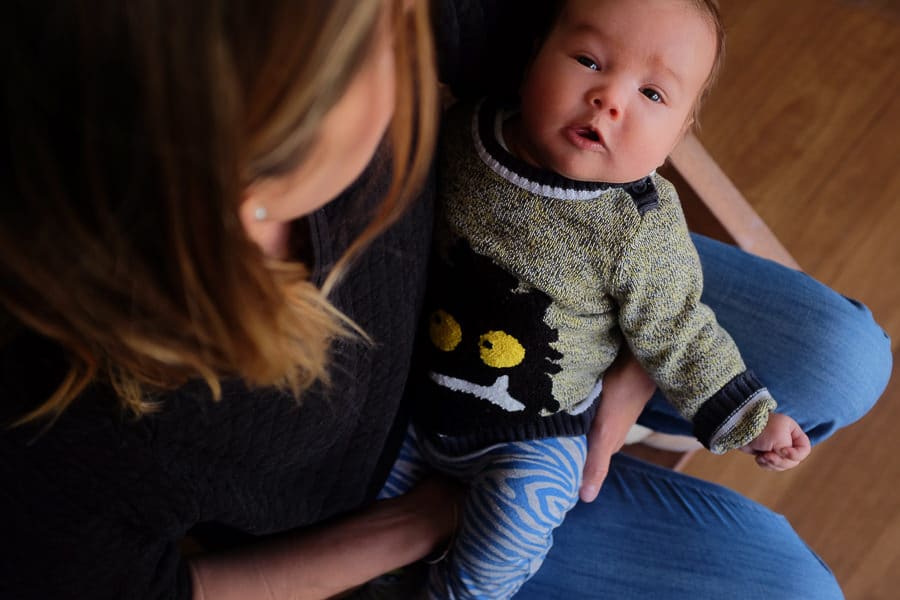
Tip #2: Focus on the eyes
How to photograph children

If your camera has the ability to control the focus point manually (i.e. not the camera deciding where to focus by itself), stick that focus point right on the child’s eye. If they’re not facing you, focus on the nearest eye.

The eyes always need to be in pin-sharp focus, and ideally they’ll show mostly the iris/pupil, as opposed to mostly the white area.

Eyes in a photo attract the viewer’s eye, and make the image instantly more alluring.

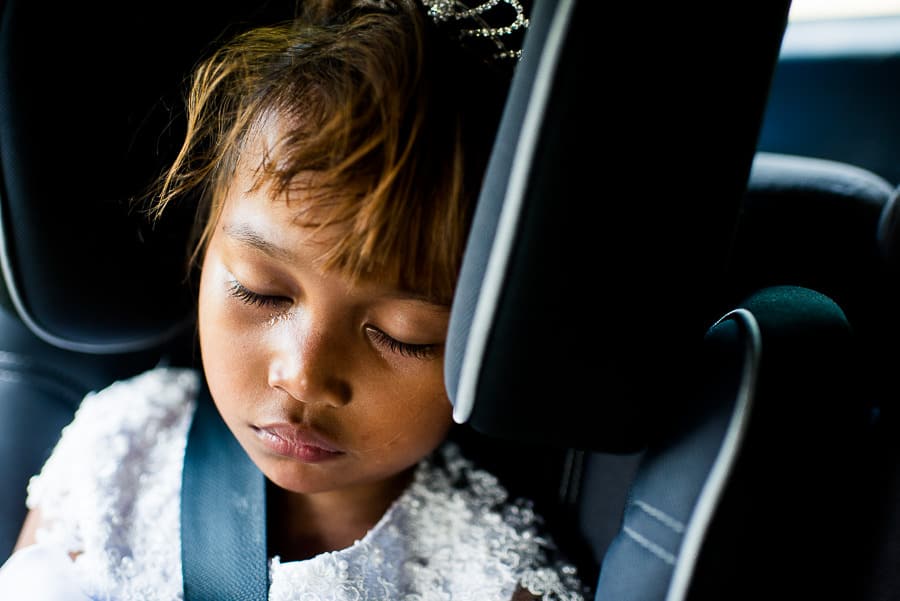
If you really want to make your child’s eyes stand out, try and get a ‘catch light’ in them. This can be achieved by ensuring there’s some light falling on your child’s face, and can really help the eyes come alive.

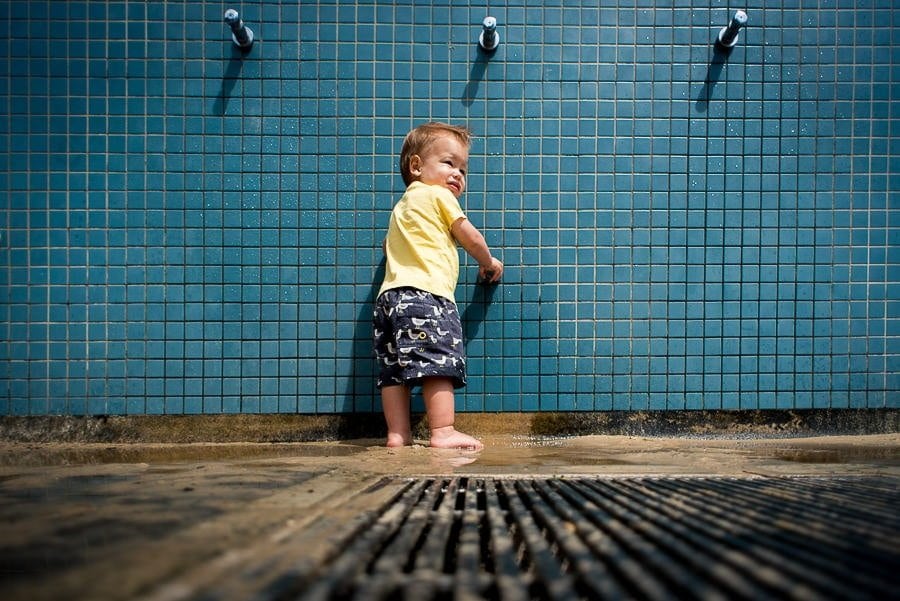
Tip #3: Get down to their level
how to photograph children

This simple tip will instantly improve the photos of your children. Try and take the majority of photos of your child at their eye level. This may mean bending down, or even laying on the floor.

If you’re photographing more than one child, try and make yourself the same height as the tallest child (unless they’re tall, in which case get them to bend down to match the height of the smaller child).

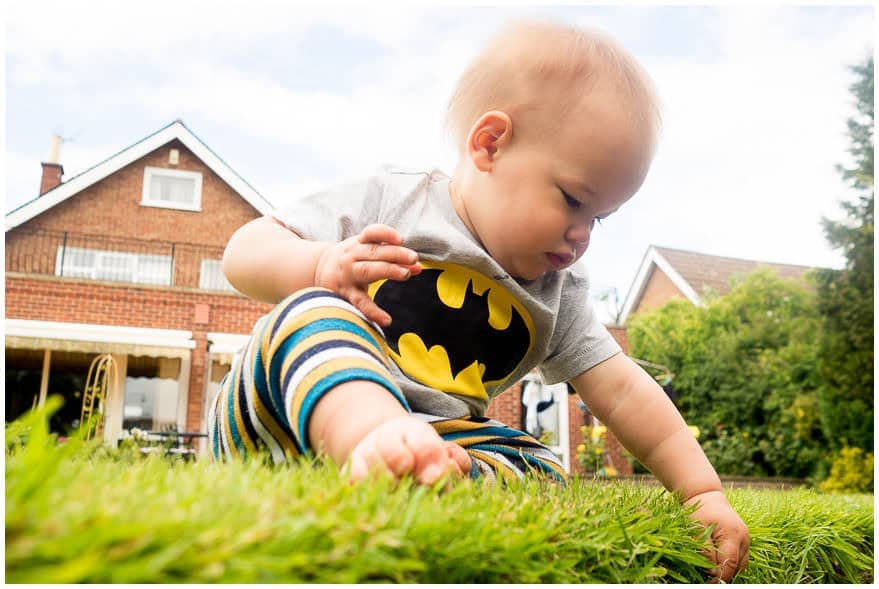
You can get creative with your compositions to exaggerate the size of your child by getting lower than their eye level and shooting upwards.
Tips on Photographing children

Remember that with photography, the interesting images are always those that show the viewer something they haven’t seen before, or something from a view they don’t normally see.

Tip #4: Shoot everything
How to photograph children

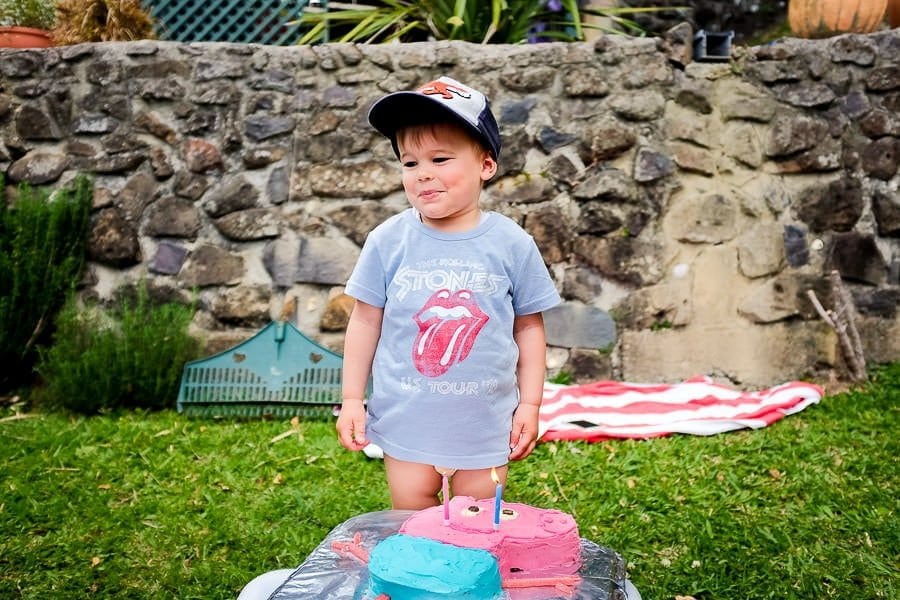
When photographing children, don’t just get your camera out at the big moments – blowing out the candles, opening the presents etc. Have it out and shooting during the in-between bits too.

It’s often these times that show your child’s real personality, and you’ll treasure these moments just as much in the future when you look back at them.

Staged photos are all well and good for the mantelpiece, but try and get some candid moments too that tell the whole story of your children growing up.

Tip #5: Make the face the brightest thing
child photography

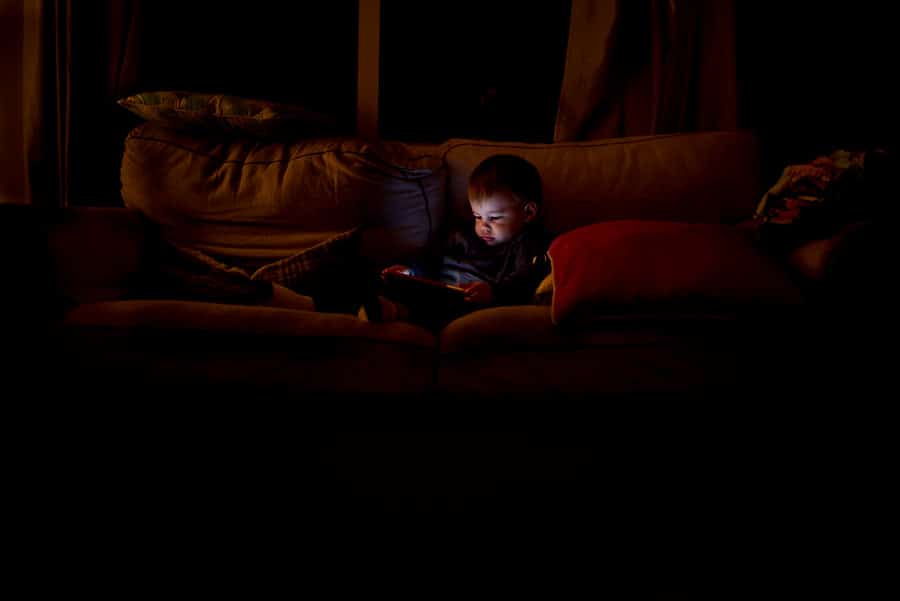
This doesn’t apply to every situation, but for the most part, you should try and make sure your child’s face is the brightest thing in your photo.

This can be as simple as moving yourself until your angle puts a dark wall behind the child, rather than the bright sky.

If you can’t do this, try and expose for your child’s face. Look up how to use the ‘Exposure Compensation’ dial and ‘AE Lock’ button on your camera. Then make the adjustment to make the child’s face nice and bright, or at least brighter than that of its background.

If you need quick reference for the optimal camera settings, keep your Photzy Snap Cards handy.

If you’re using an iPhone, tap on your subject’s face, then lock the exposure of your image by holding your finger down until ‘af/ae lock’ appears on the screen. Now re-compose your shot, fine tune the exposure if necessary by sliding your finger upwards or downwards, and finally take the shot.

Tip #6: Choose a simple background
photographing children

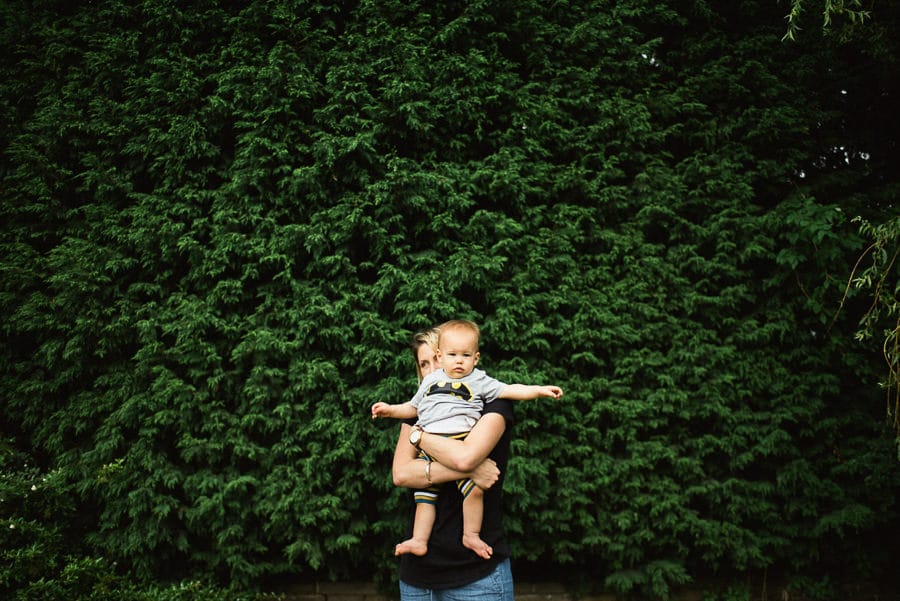
Children are often dressed colourfully, or have t-shirts with patterns or characters. Try and find a background that’s uncomplicated, and take care to ensure there are no tree branches or telegraph poles ‘sticking out’ of your subject’s body or head in the background.

Sometimes it’s hard to find something suitable to shoot against, or perhaps your child isn’t willing to cooperate and stand in the right place – in these situations, you can use software with a background remover feature when editing your images.

Tip #7: Direct the viewer’s eye

How to do children photography

If there are several people in the photo, how can you make the child the star attraction?

My favourite way of doing this is to ask the adult (or older child) to look towards the younger child. This instantly makes a more compelling image than both subjects looking at the camera (but take this photo too so you have both!)

If you’re photographing a child with two adults, get them both to look at the child for an engaging image. Make sure their heads are close, which will usually mean having them bend down to the child’s height, or having them pick the child up to theirs.

Tip #8: Shoot discreetly
children photography tips

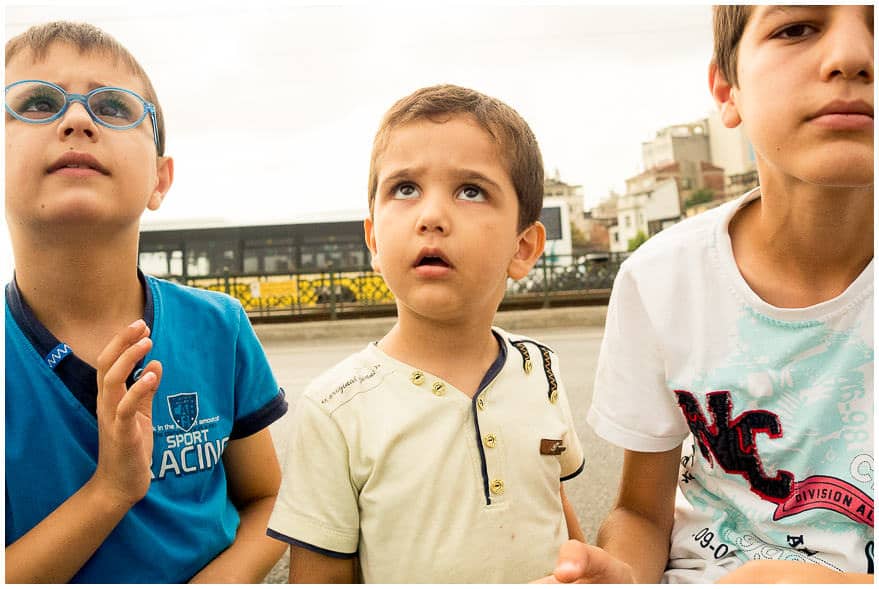
If you don’t have time to get them used to the camera, try and take some sneaky snapshots of your kids.

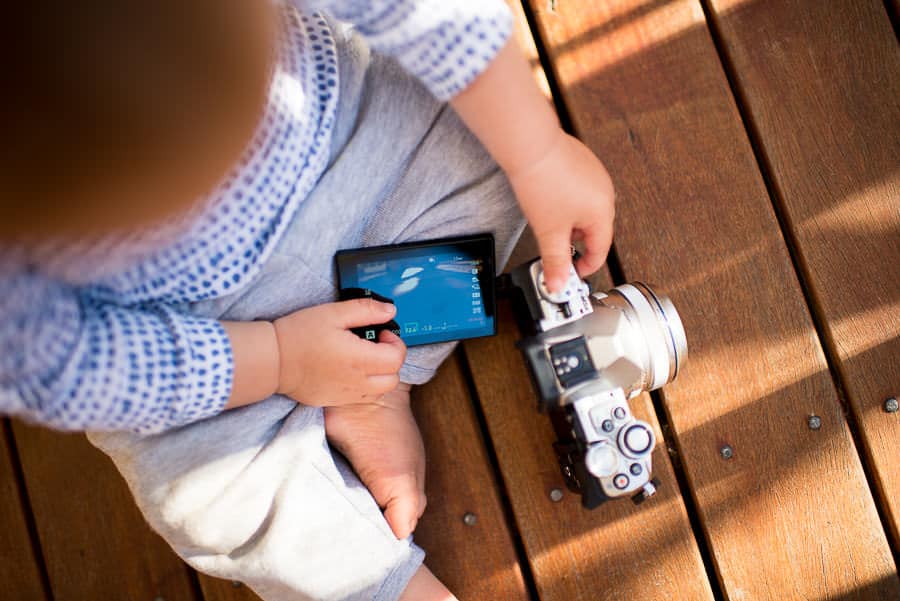
I find that using a flip-out LCD screen is the best way to do this, since it looks like you’re just checking your camera. See the final tip for some great cameras I recommend that have this functionality.

If your camera doesn’t have a flip-out screen, practice shooting with the camera away from your face. Holding it at chest level to shoot whilst engaging with the child from a distance will usually mean that their eyes will still look as though they’re looking directly at the camera.

Tip #9: Show your face

children-photography-examples

This follows on from the point above. Having a big black object blocking your face is hardly the best way to illicit natural responses from kids. Try and take photos with the camera slightly lowered from your face.

If nothing else, your subject will be confused as to what you’re doing, so you may end up with a cute expression on their face.

Tip #10: Continuous mode is your friend
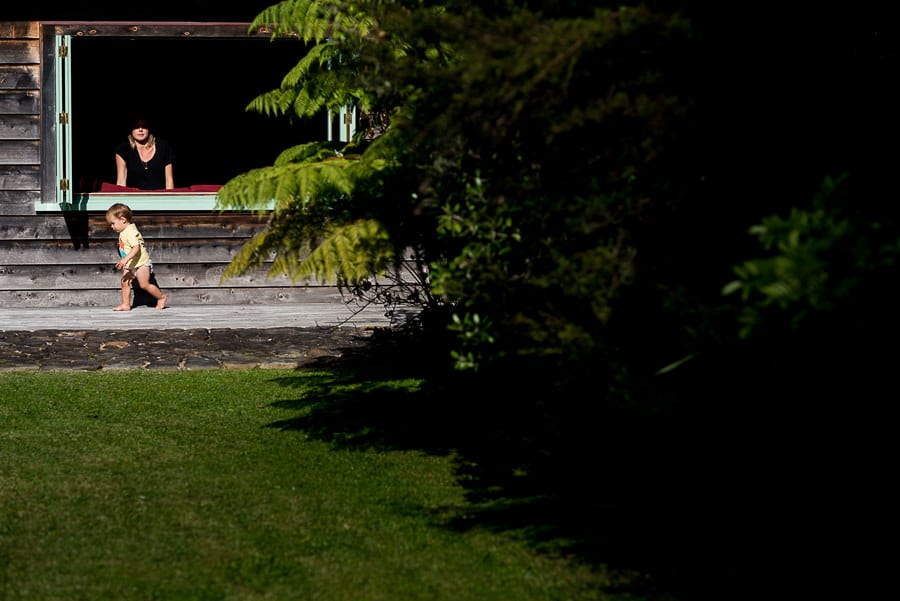
photographing children

If your camera has a rapid fire (sometimes called ‘continuous’) mode, make use of it for all your children photography. This is especially so if you’re following the two tips above, which may result in a lot of bodged photos!

It’s not ‘spray and pray’, but rather, maximizing your chances of getting that one good shot!

Digital photos are essentially free, so don’t be afraid to take lots of them if you’re trying to get that one special moment. Kids are unpredictable and fast moving, so shooting lots of photos at once can help increase the odds of getting good shots.

One word of advice though, try and find the time to go through the shots either on your camera or phone and delete the ones you screwed up before getting them to your computer. This will save you hours of culling later on, but just be careful you delete the right shots!

Tip #11: Find good light
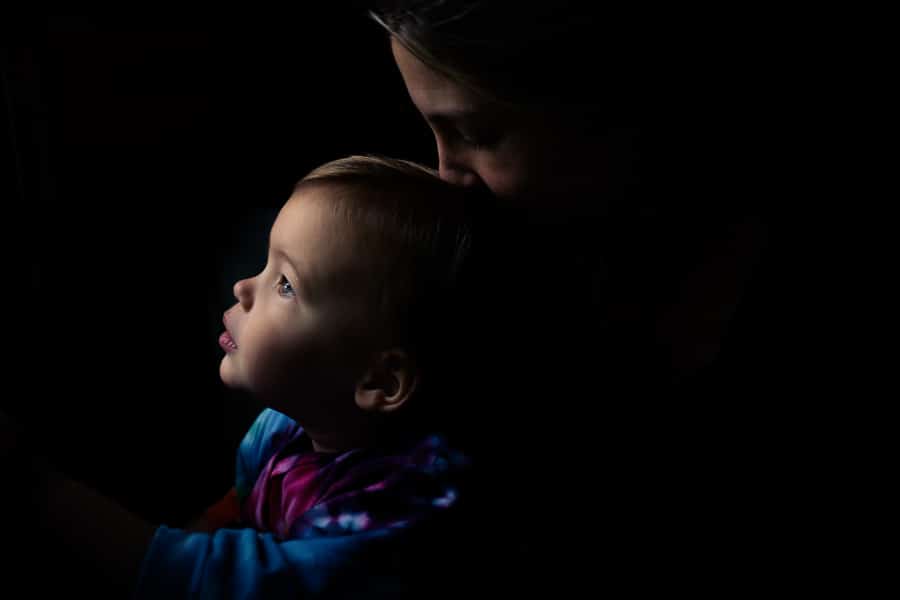
example of children photography

This tip is broad and applies to improving all facets of photography. However, with children photography we can simplify this by saying, use natural light as much as possible.

This means getting the child near a window, or even turning off indoor lights if they’re turned on during the day. The above photo was taken just using the light from a window in a dark room.

Obviously if you’re trying to shoot candidly your children won’t always be next to a window in perfect light. However, for those odd shots where you have some time, just asking them to stand in the right place (or picking them up and putting them there) before clicking the shutter button can create a much more pleasing image than one taken in bad light.

‘Good light’ can also mean interesting light, so keep your eye out for small patches of light in an otherwise dark area which you can use to highlight your subject. This is where shooting in your camera’s Manual mode can help, since you can alter your exposure so that the light area is more dominant and the darker area falls away into blackness.

If you’re not confident yet in Manual mode, twist the ‘exposure compensation’ dial on your camera to minus (-) until the photo looks how you want it.

Another precursor to unflattering photos is harsh light, particularly midday sun or sunlight that is very strong and directly overhead. You should still take the photos of the children frolicking in the sun if it’s happening, but for the best photos, tell them to go and run around under the shade of a tree. The light on their faces will be softer and result in much more pleasing images.

Tip #12: Don’t be afraid to crop
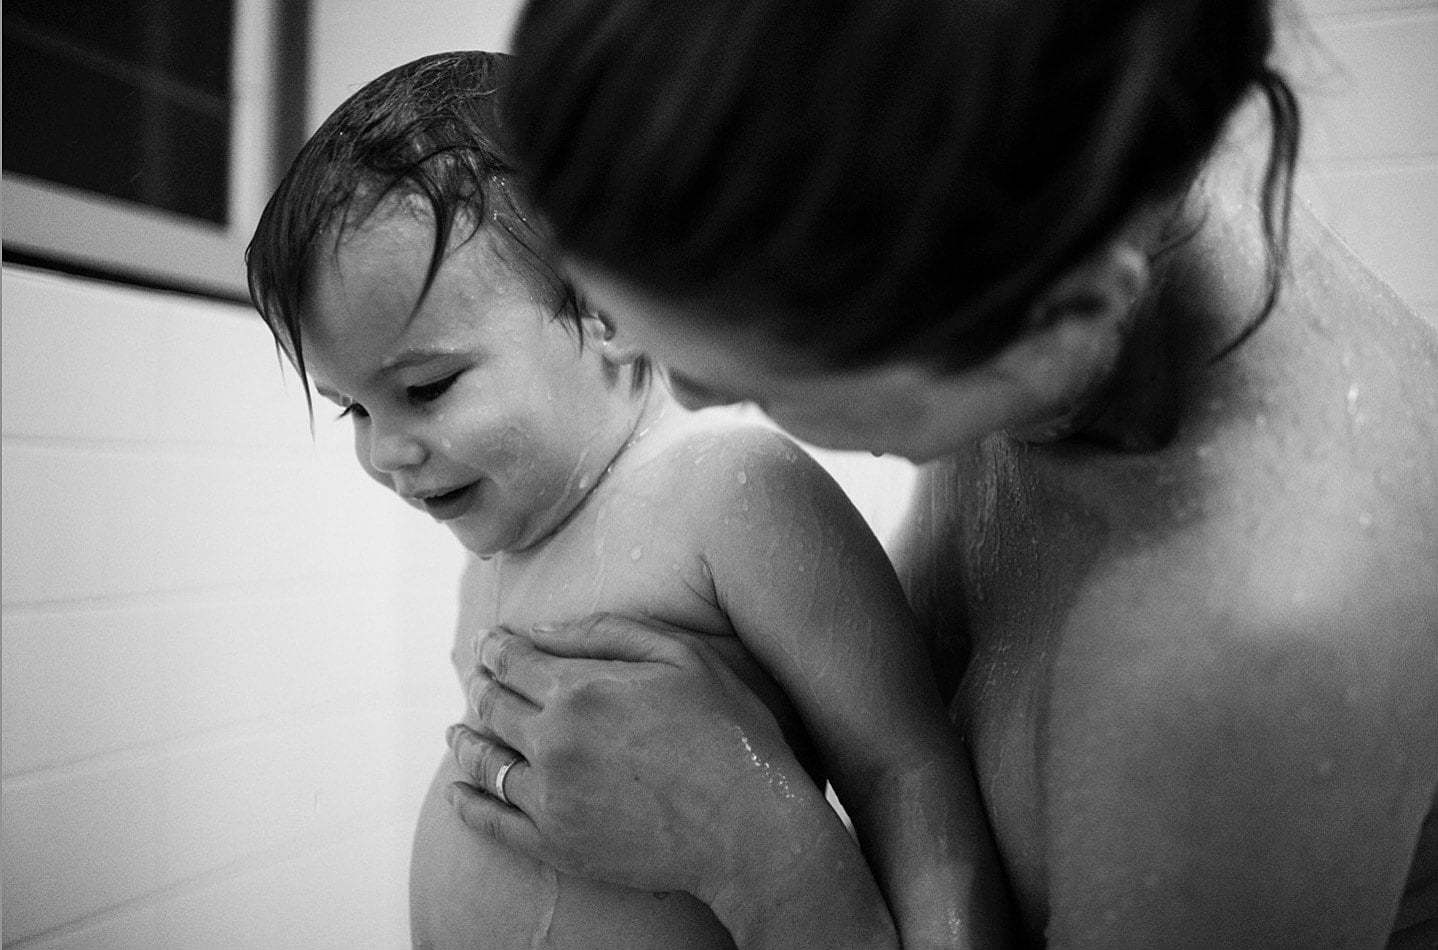
how to crop children

I’m talking about cropping in-camera here, not in front of your computer – no parents have time for that!

Don’t be afraid to cut part of your child’s torsos or even face off with your framing if it helps the viewer’s eye to focus on what’s important.

It can feel strange to cut off a subject’s legs in a photo for an amateur photographer, who will usually try and include their feet and some of the ground too in every image.

However, if you adhere to certain rules of where to crop your subject, you can fill the frame with more of what matters. This is especially true when photographing children.

In general with kids, don’t be afraid to get closer and crop their legs out of the picture, above the knee, or their feet above the ankle.

If your camera has a zoom, use it to show off their face by zooming in tight and cropping the top part of their head, or at the lower neck.

Tip #13: Experiment with your composition
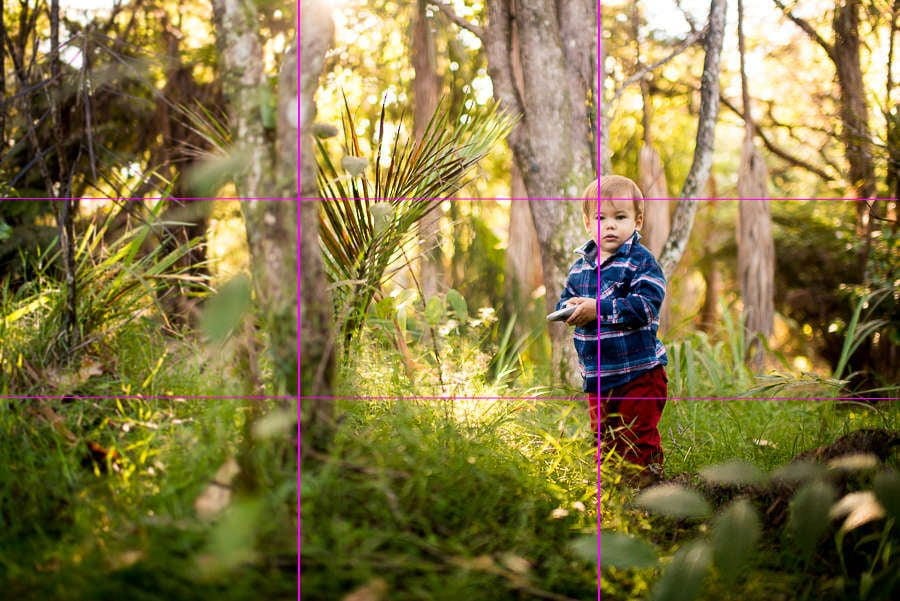
rule of thirds in child photography

Photography composition is a huge topic with many rules, and most of these rules can also be broken to still create a compelling image.

In the interests of simplicity, I’ll break this down to one piece of advice when photographing children – experiment with placing your child off-centre in the frame. In other words, don’t always take the photo with your subject right in the middle of the picture.

If you want to get more specific about one of the more popular rules of composition, read the basics of the rule of thirds. By simply placing your child’s face on one of the imaginary lines that divide your frame into 3, you can immediately create a more compelling image.

To do this, compose your photo with your subject in the middle and hold down your shutter button halfway to engage the autofocus. Then recompose your image, placing the subject on one of the imaginary ‘rule of thirds’ lines, and press the shutter button all the way down.

Tip #14: Timing is everything
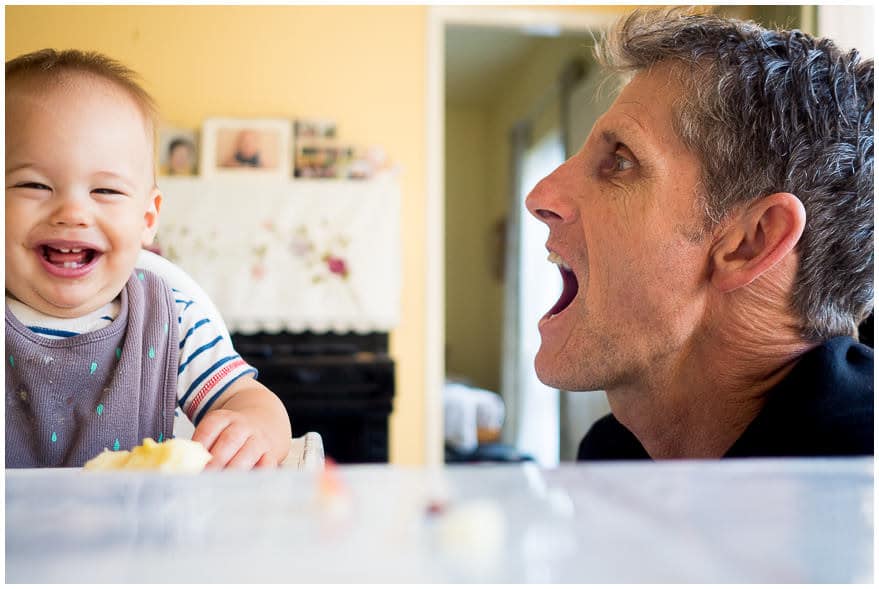
Tips on Photographing kids

Parents will know where I’m coming from on this one. You’ll know when your child is most happy, and this is no doubt the same for other children of the same age too. After waking up from a good sleep, after snack time, playing with their favourite toy etc etc.

Choose your time wisely to pull out the camera for shots of them looking naturally happy, with no need for you to say “Cheese!”.

Choose a time when your children are distracted with a toy or activity to get a candid photo of them looking happy, totally unaware of your camera.

Tip #15: Get them talking
children-photography-ideas

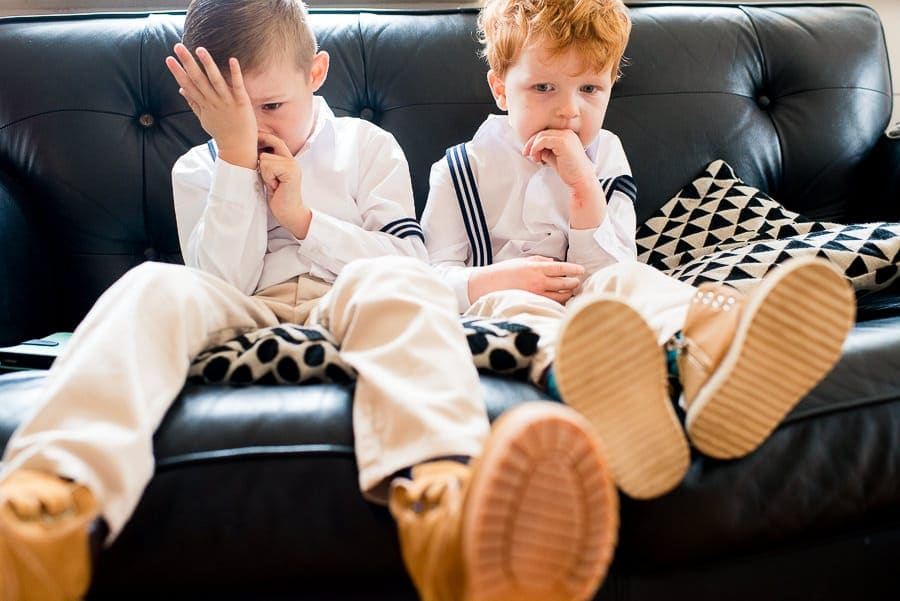
This one holds true for adults too, but it’s a great tip for improving the photos of your children, especially younger kids. Ask them a question and wait until they start answering it before raising the camera to your eye. Or even take a quick snap of them thinking.

When the child is talking or thinking they’ll be distracted from your camera, which should allow you to get a natural looking photo… or just one of complete boredom/frustration like the one above!

Tip #16: They don’t need to smile
photographing children

“Cheese” is a word that makes professional photographers cringe, and it should be out of your vocabulary too… unless you’ve got the biscuits out!

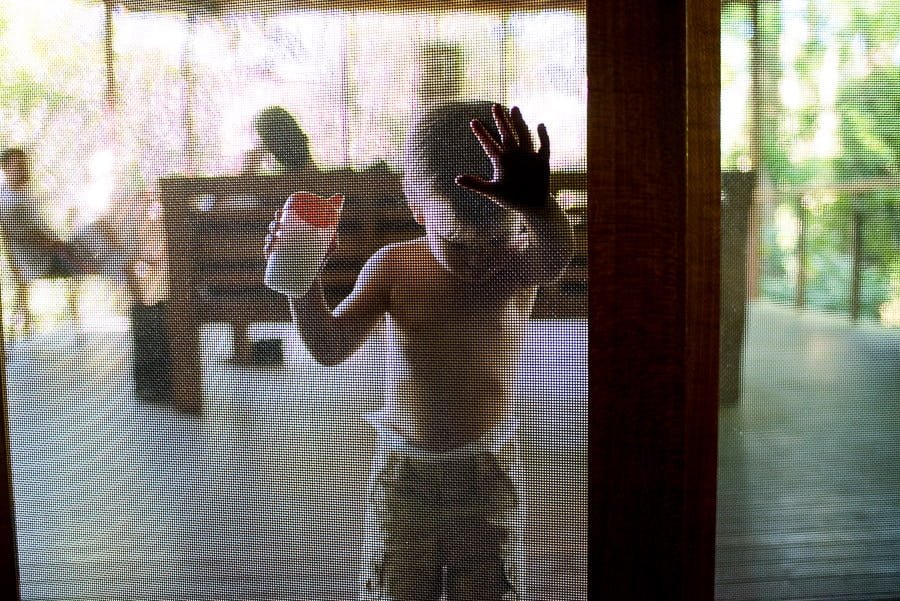
If your child isn’t smiling when you come to take the photo, don’t worry – take it anyway. Show how they look normally, not how they look when they’re told to create a fake smile, which is basically what “Cheeeese” accomplishes!

If you really want the smiling shot, you’re going to have to make them smile by talking about their favourite animal, food, tv show… or just use your funnies to get them laughing.

Tip #17: Use a helper
4children-photography-examples

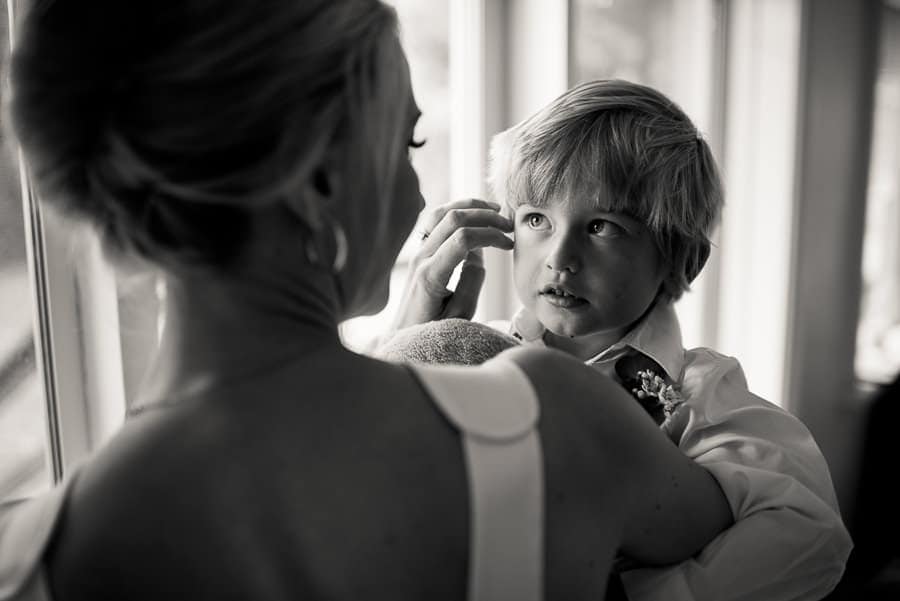
If someone’s available, get them to stand behind you at your level. That bit’s important – they need to be at the same level as you, or your subject’s eyes won’t be looking into the camera.

If you’re taking a photo of another person’s child, get mum or dad to stand or crouch behind you and have them call their name, say something funny, make noises – whatever it takes to get your desired reaction.

Or even simpler, just wait for the child to be interacting with someone else, such as in the photo above.

Tip #18: Alter your perspective
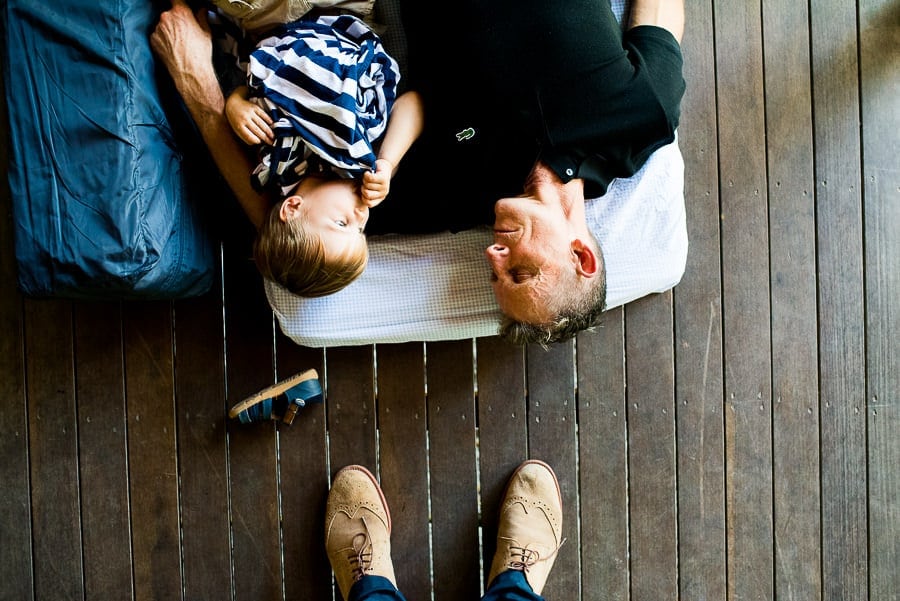
how to photograph children

I mentioned earlier that getting down at their level can really help when photographing children. Well it’s now time to break that rule, but we’re still going to be using an angle of view that’s not normal.

Photographing kids from above can give an interesting perspective. If you have a tilting LCD screen on your camera, you’ll find this much easier – look at the final tip in this series for cameras I recommend that have this feature.
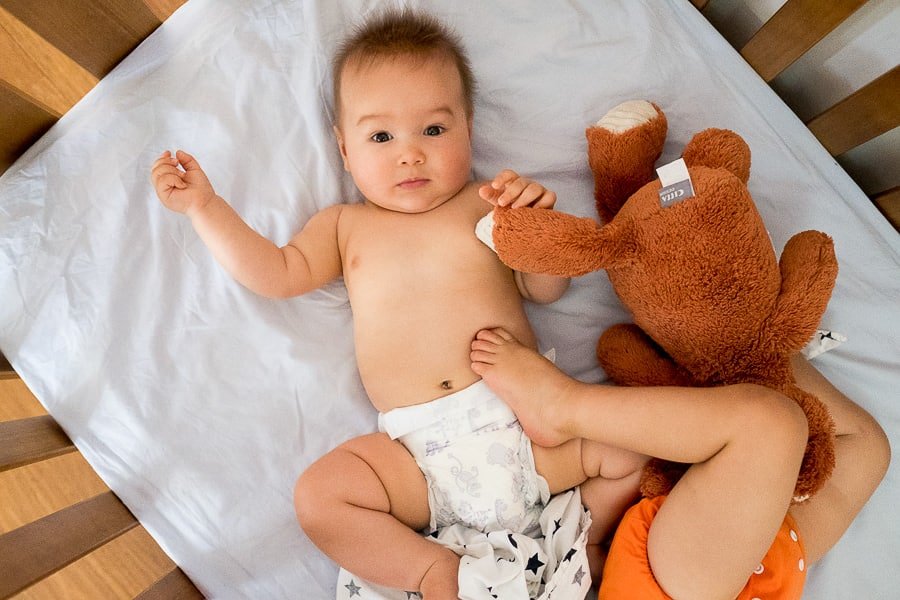
children portraits

My favourite shots are often those taken directly above the child, especially if they are laying down. This angle of view never fails to create an interesting photo, especially if you have time to compose the shot.

You may even decide to include some of yourself in the photo, or just part of another person such as in the two shots above.
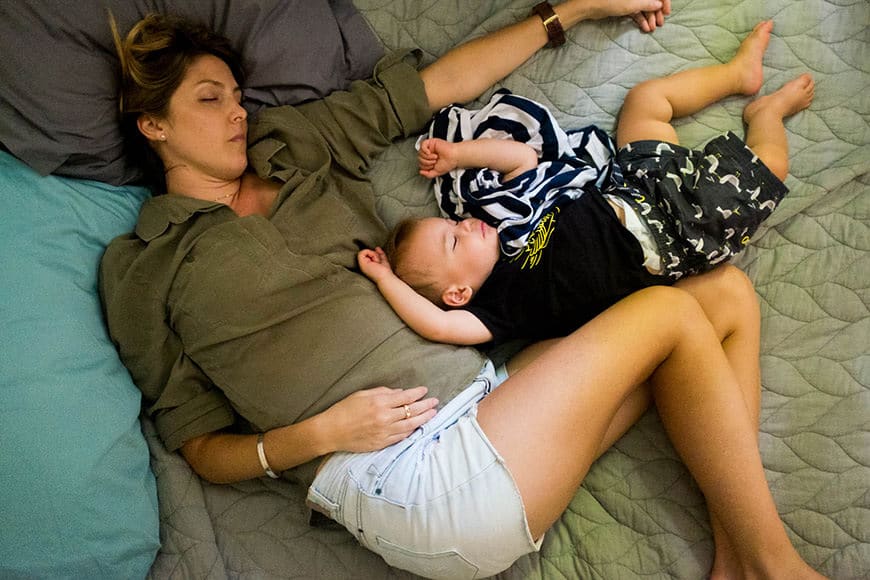
children portraits

Try it next time your child is asleep. Take extra care to get the shot completely perpendicular to where they are laying. If you’re lucky, your partner will be alseep there too, giving the photo an extra sense of scale… which brings me nicely on to the next tip.

Tip #18: Use scale
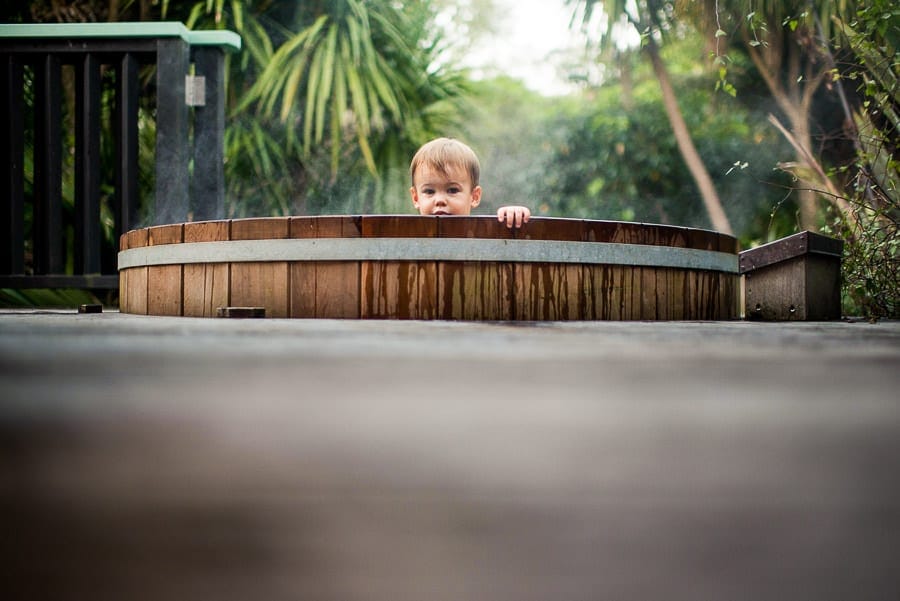
example of children photography

Following on from the previous tip, sometimes it’s a fun photo to make the child seem really small, or at least, small in comparison to the other objects in the frame.

This can be as simple as putting the child on a large arm chair, having them wear adult boots, or stepping right back to shoot them from a distance against a large object such as a wall.

Photos of children

Tip #19: Get in close

get in close

This is a tip that applies to all manner of photography, and one that is the difference between a good photo and a great photo.

When photographing children, unless you absolutely need to use the zoom on your camera, don’t touch it. Instead ‘zoom’ with your feet, and get up nice and close to your child for a really engaging shot.

Obviously you’ll want to vary the distance of your child from your camera for variety, but try and take that extra step closer for your next photo and see what a difference it can make.

One caveat – if your camera lens is ‘wide’, i.e. has a number lower than 35mm, steer clear of placing your subject on the edges of the frame when you get close to avoid any funny distorted features.

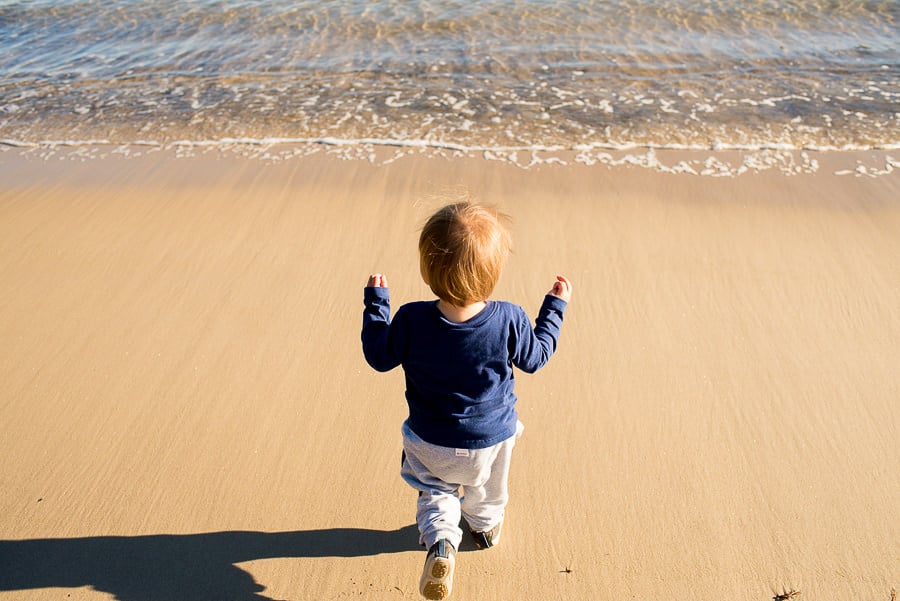
Tip #20: Shoot from behind/Don’t show the face
Children Photography

You don’t always need to take photos from the front when photographing children.

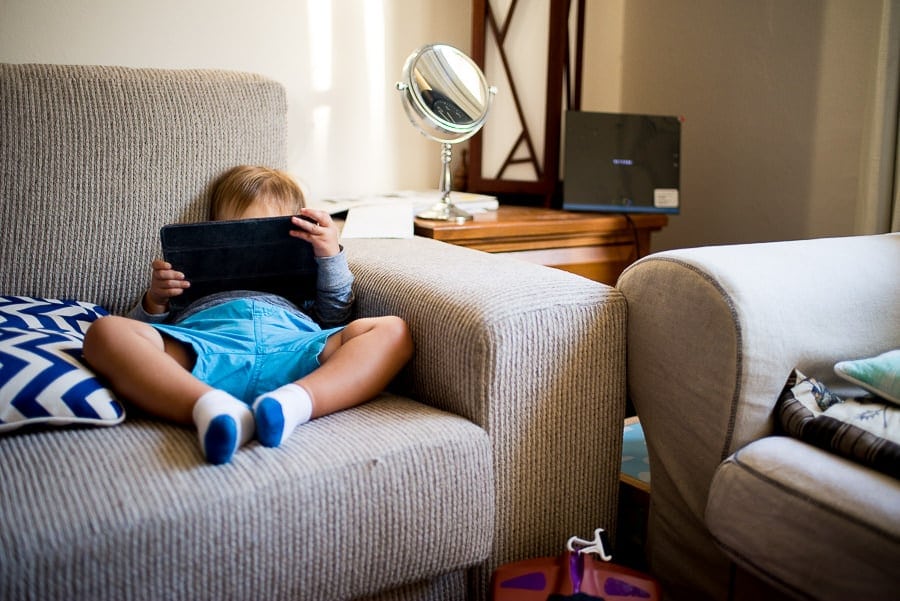
Try mixing in some photos of the kids running away from the camera, or take some from behind whilst they’re looking at a view, or even with their face hidden whilst reading a book for example.
How to photograph children

You don’t always need to have a face in a photo to tell a story about a person, and often removing it completely encourages the viewer to paint their own picture about the subject’s emotions.

Tip #21: Focus on body parts
Taking photos of children

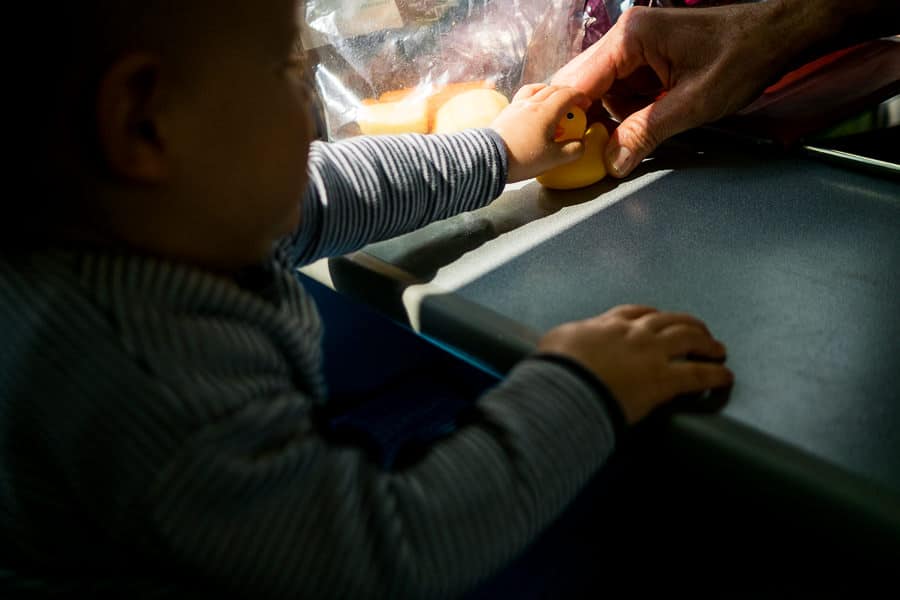
The photo of a baby’s hand clutching daddy’s finger is a bit overdone in baby photography, but it’s still a good one.

Don’t be afraid to crop out everything else and focus just on a single hand, the eyes, the feet, or whatever you find cute.

Including another object or element to highlight how small the body part is will also help tell the story.

Tip #22: Accessorize!
photographing children

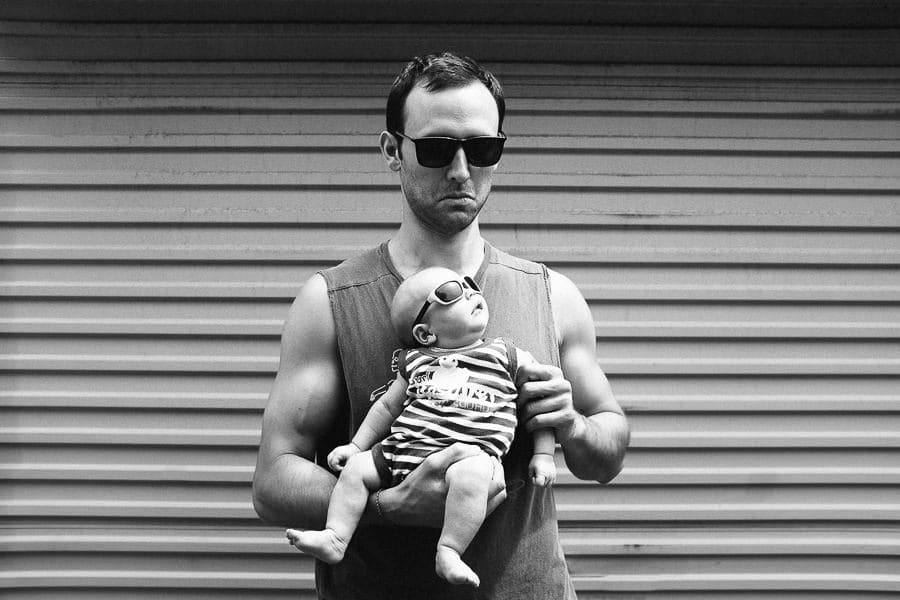
Putting your sunglasses on your child may only be funny to you… but it’s still funny! Dress children up in adults’ clothes and accessorize them before they’re old enough to complain that you’re embarrassing them :p

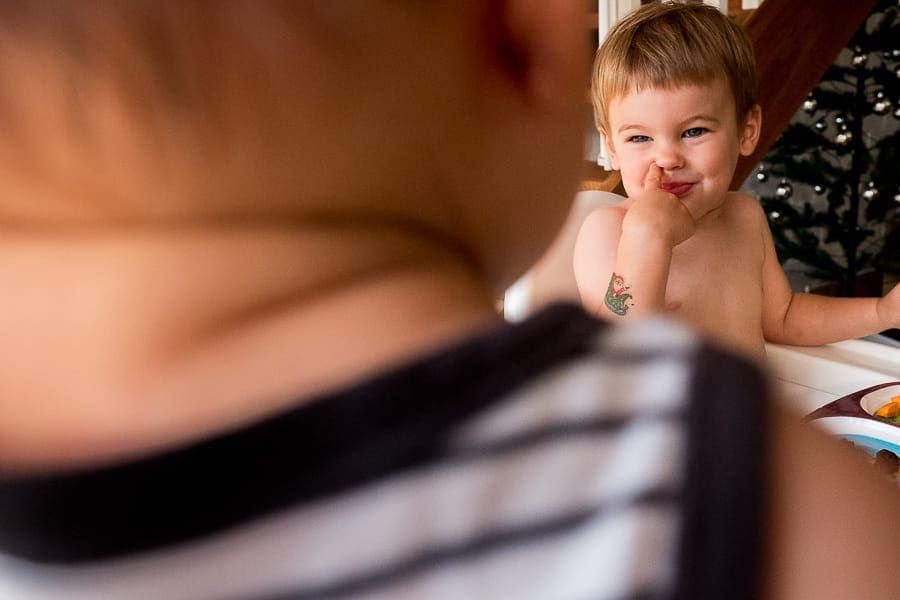
Tip #23: Use layers
kids portraits

This is another favourite tip of mine that can vastly improve all genres of your photography, and it’s also relevant when photographing children.

Layers in this case are foreground and background elements that help create a three dimensional story. You can experiment with shooting through foreground elements, like getting down really low and including the grass in front of a child, whilst keeping the focus on the child.

Another example and a layering technique I use a lot is to include part of another subject’s body as the foreground element, such as their legs if the main subject is a small child. This helps to not only give perspective to the size of the child, but also helps to tell the story, and can even help to ‘frame’ your subject too by directing the viewer’s eye.

You’ll usually want to use as high an aperture as possible on your lens (f/1.4, 1.8, 2, 2.8 etc), or as long a lens as possible (or try zooming right in) to help blur the foreground and background elements and keep the viewer’s focus on the subject.

Take a look at the final tip below for my recommendations for lenses that can achieve the ‘blurred foreground/background’ effect easily, or if you’re using a smartphone, check out this guide on apps to blur the background.

kid photography

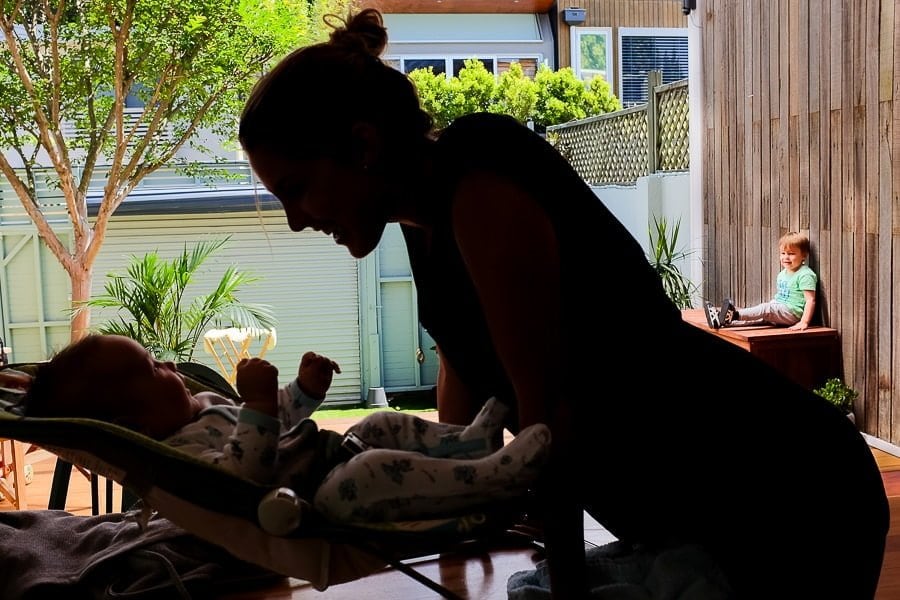
Layering needn’t always necessitate blurring of the foreground and background – you can also use other means to direct the viewer’s eye, such as different lighting or silhouettes as in the photo above.

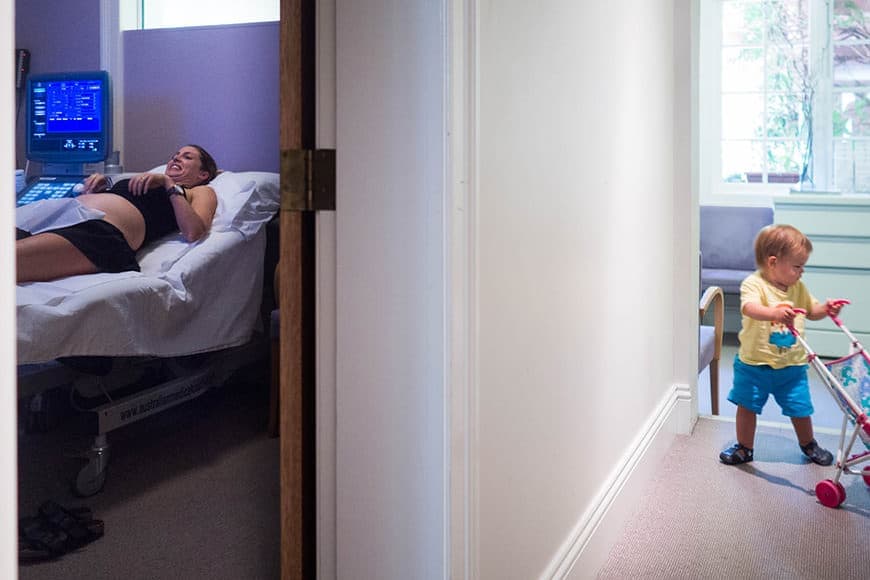
Tip #24: Tell two stories
kid photography

One secret to an engaging photograph is to try and convey two stories in the one frame.

This encourages the viewer’s eye to linger for longer on the photo, since there’s more than one thing happening at the same time. If the two events are related in some way, all the better (such as the photo above during the ultrasound of our second son).

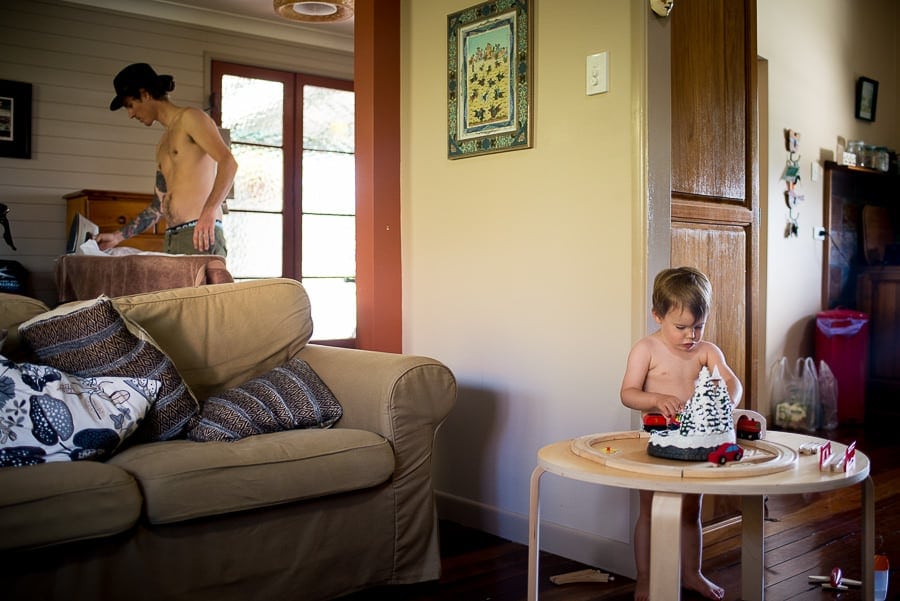
Next time your child is playing with his toys for example, get the candid shot first, then take a step back and see what else you can include in the frame to tell another story – maybe there’s someone in the background cooking, or ironing a shirt for example.
child photography

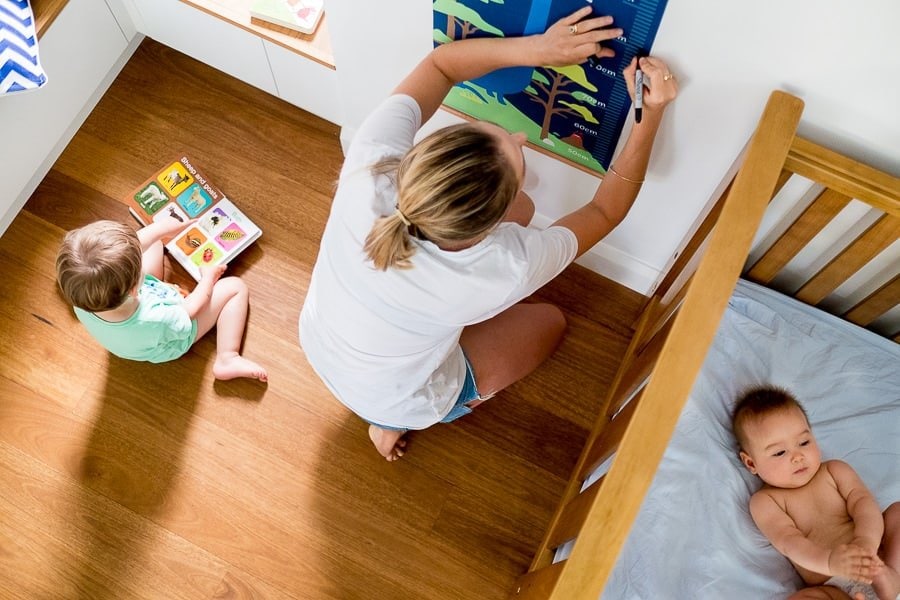
You may even try and include a 3rd element to tell multiple stories at once.

In the photo below I wanted to record our son’s first height measurement, then found that if I made my frame a little wider by holder the camera higher, I could show our second son in his cot too.
photography of children

This had the additional benefit of balancing the final photo, whilst telling 3 different stories at once.

Tip #25: Learn Lightroom

Speed Up Lightroom

I know this one’s a really broad tip that does require some investment of time, but being able to make small edits to the photos of your children in Lightroom can make the world of difference to how they look.

Lightroom is a great imaging software since it’s very accessible for amateurs, but powerful enough for pros. The cost is not too high (click here to find the best place to buy Lightroom), and unlike Photoshop, you can pretty much guess how to use it after fiddling around for a few minutes.

In simplest terms, Lightroom allows you to ‘rescue’ a photo that’s too dark or too light, by editing it after you’ve shot it.

I’d also recommend you shoot in RAW format to maximise the amount of dynamic range you can get from a photo – see RAW vs JPEG.

Of course, there’s a whole world of various edits you can make to your photos using Lightroom, but if you’re time poor (i.e. most parents out there!), I’d stick to playing around with the ‘Basic’ sliders in the Develop module until you see a look that you like.
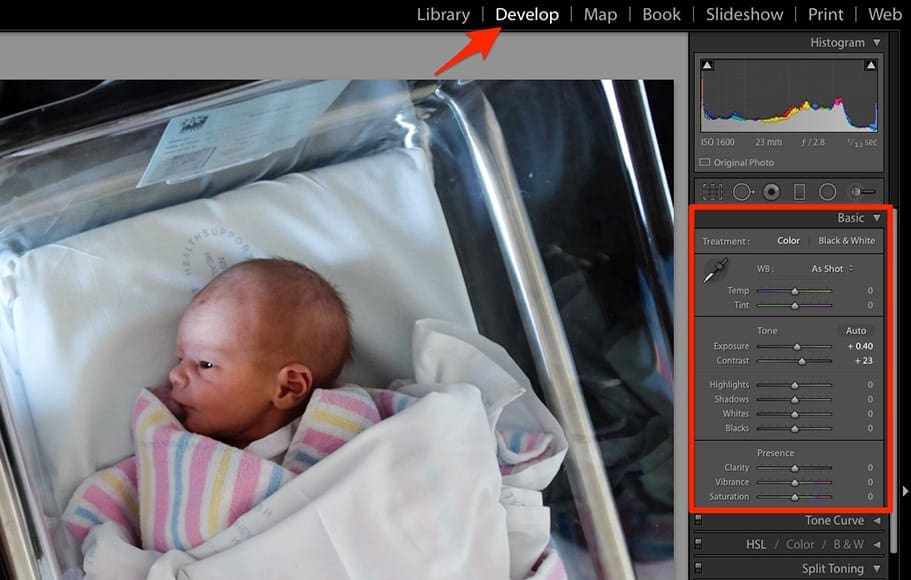
learn lightroom

I’d also recommend this video course on how to use Lightroom that I reviewed, or Lightroom Power User – an ebook I wrote with some Lightroom Tips and Tricks for those who really want to see what’s capable with this powerful software.

When photographing children, getting the shot is the first hurdle. If you really want to make the most of that photo (and you have the time), post processing it with software such as Lightroom is essential.

Tip #26: Shoot selfies
children photography tips

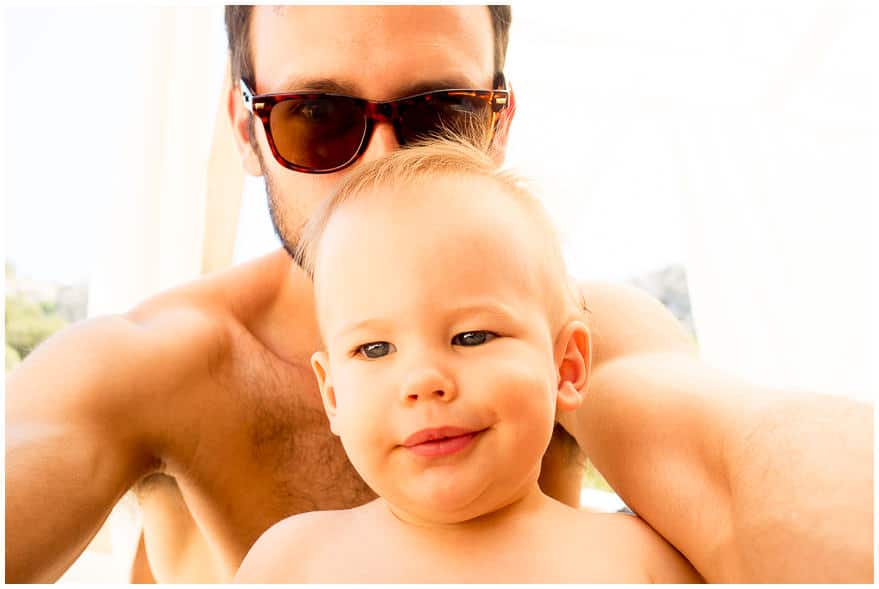
Having your kids in the photo is the only socially acceptable time to shoot a selfie… right?! You’ll need to use a lens that is relatively ‘wide’ (any number lower than 35mm), and having a camera with a flip out screen will allow you to compose/time the photo far easier.

If you don’t have a camera with a flip out screen, or any camera at all for that matter, don’t worry – just use your phone like everyone else!

Tip #27: Use a timer
children-photography

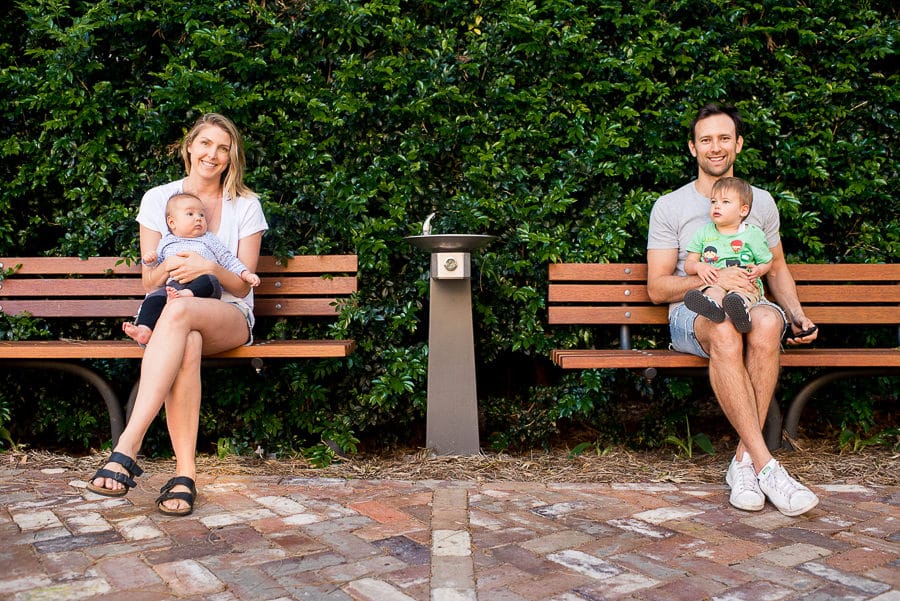
Every camera these days has a self-timer. Even your phone has a timer, so next time you’re out with the family, set it up on a flat surface and get a DIY group family shot!

I’d recommend setting your camera up to shoot a few photos in quick succession to increase the odds of one of them coming out well.

Some cameras (including the ones I recommend in the final tip) offer Bluetooth connectivity which means that you can see your camera’s screen on your mobile phone screen, making it much easier to compose the shot and get the right moment.

(You can see in the shot above that I’ve got my phone in my hand, pressing the shutter button on my camera remotely.)

Tip #28: Just get the shot
iphone photo of children

You’ll see in my final tip that I recommend the best compact camera for photographing kids. However, before I get into that, it’s worth remembering that often all that’s important is just getting the shot.

If all you have near you is your mobile phone, that’s fine, just use it. Unless you plan to sell your work, no one will care about the quality of the image – all that matters is that you capture that moment.

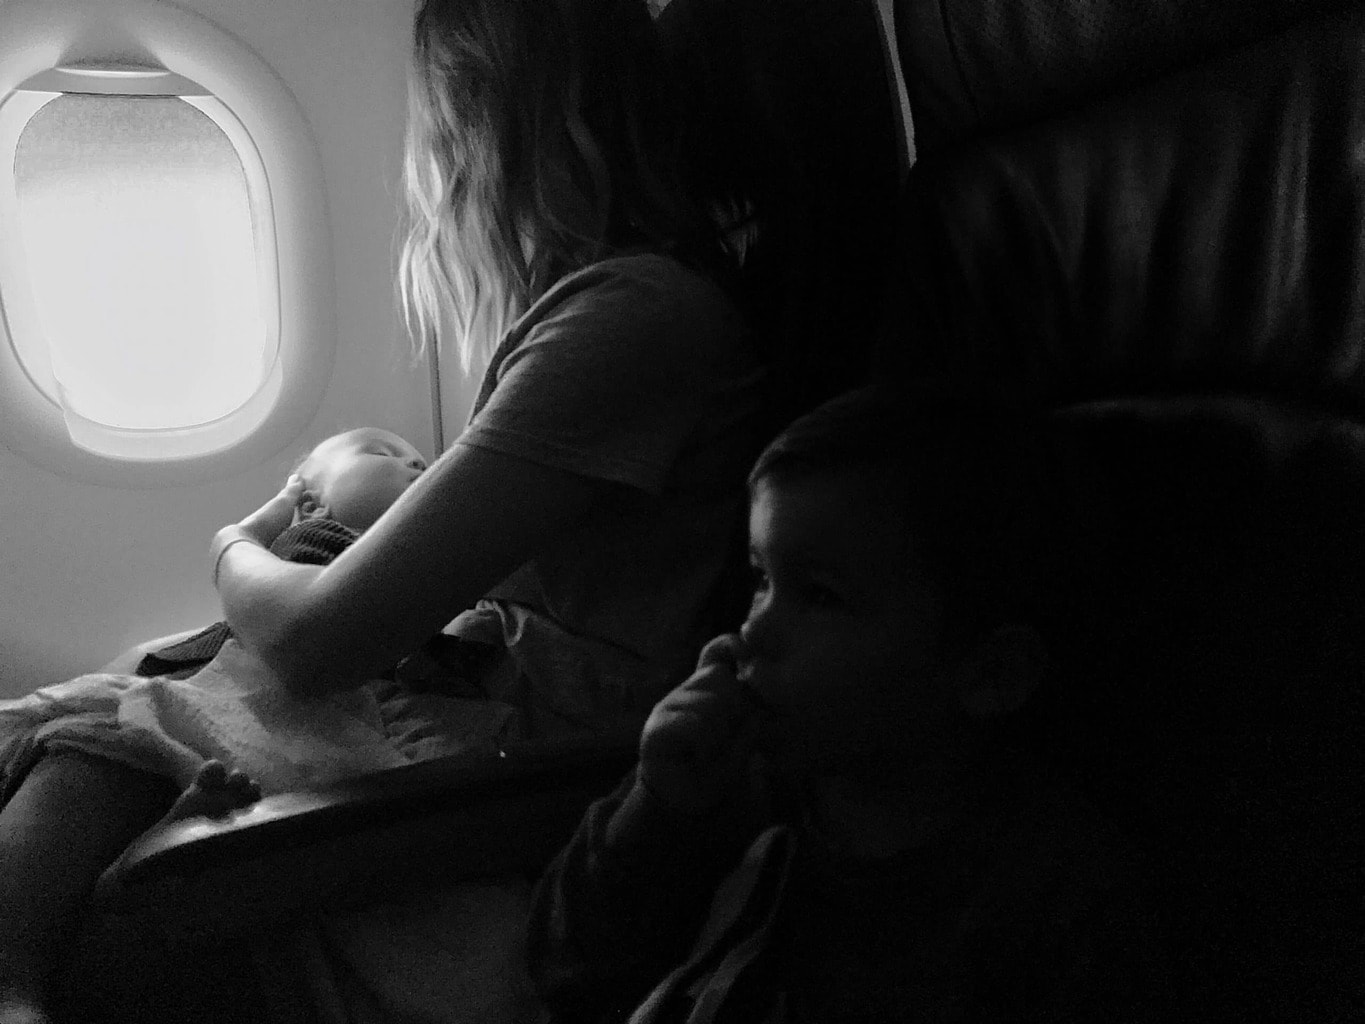
For every fancy camera I own, my mobile phone is always closest to me, so that’s what I’ll reach for first. In the shot above I noticed some interesting light falling on my family, so I used my iPhone to capture it. By locking exposure, taking the shot, then converting it to black and white using the standard iPhone Photo app, I think I captured a fleeting moment I would have missed if I’d got my other camera out of the overhead locker.

Tip #29: Get the right camera
Olympus_OMDEM5ii_Review

I’ve left this tip to last as in some ways it matters the least, but in others it matters the most. What I mean by this is, the best camera is the one you have with you… which usually means it’s your mobile phone.

As Wayne Gretzky once said, “you miss 100% of the shots you don’t take.”

However, if you want to take better photos of your children, you really should invest in a good camera. No matter what the Apple marketing may tell you, your phone still can’t take as good a photo as a dedicated camera!

I’ve lost count of the number of parents who’ve asked me what is the best camera for taking photos of children. I’ve also lost count of the number of parents who’ve invested in a clunky dSLR, never to take it out of the bag.

Follow my advice if you want to buy the right camera for taking photos of your kids. In my opinion, you need a camera that is lightweight, small and has fast Autofocus. If it’s also got ace recognition and a tilting LCD screen, happy days!

I’ve written guides on the best cameras under $500, the best cameras under $200, the best mirrorless cameras and the best compact cameras, but as a parent, you’ll have no time to read all that!!

If you’re willing to invest some money into capturing all those fleeting moments of your children growing up and think you might even take up photography as a hobby, my first choice every time would be this Olympus OM-D EM-10 Mark II mirrorless camera.

The best camera for photographing kids – The Olympus OMD-EM10 Mark II

There are so many cameras to choose from but that Olympus ticks all the right boxes, and gives you room to grow as a photographer. It also has one killer feature that none of the other cameras do – the ability to touch the screen and instantly focus and take the photo.

This makes it invaluable for fast moving subjects or times you want to take really discreet photographs, and therefore makes it in my opinion the best camera for children photography. Get the latest price on it here.

The kit lens that comes with the Olympus will see you right for the first few months, then if you want to take things further, invest in this M.Zuiko 17mm f/1.8 lens which will make your images look better immediately. You’ll also be able to achieve that coveted ‘blurred background’ effect far easier.

For examples of photos you can achieve with this camera/lens combo, I shot this entire photo series of our family holidays in Europe using this incredible lens.

There’s a point in photography where expensive cameras and lenses stop making a difference to the final image, but at this price point, getting a good lens on the end of your camera can make a huge difference.

Another great camera for children photography is this Sony Alpha a6000 mirrorless camera, which has the fastest auto-focus of any camera in its range, as well as great image quality and that all important flip-out screen.

Another great camera for photographing children – the Sony a6000

When you’ve mastered the zoom lens that comes with the camera, invest in this Sony 35mm f/1.8 prime lens and see how much better your images can look.

Even if you can’t see yourself taking up photography as a hobby, I’d still recommend spending a certain amount on your camera to be sure the photos will remain better than your smart phone for a few years. I’d recommend this Fuji X70 camera which ticks all the boxes I mentioned earlier but won’t distract you with interchangeable lenses.

Another great camera for photographing children – the Fuji X70

You’ll notice I don’t recommend one dSLR, for the simple reason that I consider them far too bulky to carry with you on a day-to-day basis.

With the image quality of mirrorless cameras virtually indistinguishable from a dSLR these days, it makes more sense for parents to get a lightweight mirrorless camera that they’re more likely to have with them in a bag or pocket.

A child taking photo with camera

Teaching Kids How to Take Better Photos

A child taking photo with camera

As a dad and photographer, I’ve been able to share my passion for photography with my kids , helping them to develop their own photography skills. They have loads of crazy fun, and yet take much better photos than if I had left them to figure it out on their own.

With the exception of the group photo and the shot of my son holding his camera, every photograph in this article was taken by one of my kids.

If you want a fun activity to share with the kids in your life (from around 7 to 13), try some of the practical tips, tricks, and mindsets in this article. Whether as part of a family, school, club, or other group, kids prosper when given the right guidance—in photography or anything else they find interesting.

Start with a Cheap Camera

You don’t need a top-of-the-line camera to get kids excited about photography. Inexpensive, entry-level, point-and-shoot cameras are perfect because they’re small, lightweight, unintimidating, and replaceable. Quite often they are available in custom colors.

Don’t obsess over the specifications. Get a simple camera. You can ignore pixel count, ISO speed, LCD size, and other features. All you need to get started is a few helpful shooting modes (Auto, plus some scenes and effects) and the ability to zoom in and out a bit. Be sure to get a compatible memory card, and, if the camera takes rechargeable batteries, a backup battery.

Use Auto Mode

Kids should start out using a camera’s Auto shooting mode. Frankly, it’s the best mode for beginners of any age! When in Auto mode, the camera handles all the important exposure settings. Auto mode helps kids gets used to the essential skills of holding the camera, zooming in and out with the lens, composing a scene, taking, and reviewing pictures, or taking selfies. You can teach a lot about photography before you ever need to address other shooting modes.

Practice with People, Pets, Flowers, and Toys

Encourage kids to take pictures of things that interest them. Eventually they may want to pursue more abstract subjects, textures, shapes, tones, and geometries, but they will do very well to begin with people, pets flowers, and toys. You should be able to supply one or more of these categories in abundance.

As kids photograph people and pets, they develop their portrait skills. This includes framing the scene and getting a nice, sharp photograph. Flowers and toys will hone their still-life and close-up skills.

Compose in Thirds

Try instilling the Rule of Thirds in your budding photographer from the beginning. An essential principle of good photography, the Rule of Thirds divides a photo into thirds vertically or horizontally and places important features at intersections or along the dividing lines. This practice is important for capturing most scenes and people, but is less important when photographing flowers and other unmoving subjects that naturally fit best in the center of a photo.

Inexperienced photographers typically frame photos of people. My wife and I are positioned in the exact center of the photo. While not the worst photo in the world, it leaves a lot of wasted space above us.

Avoid Backlighting

When kids are taking pictures, teach them to pay attention to where the dominant light source is located. If they are looking into the light, remind them to try to reposition. Looking into strong lighting fools the camera into thinking that the ambient lighting is brighter than it is, which makes people and other subjects look darker in the shot.

When taking photos inside, this backlighting situation happens most often when the subject is in front of a window or door. When photographing outside, strong backlighting is related to the photographer’s position in relationship to the sun. As much as possible, subjects should look toward the sun or to the side.

Encourage Close-Ups (They’re Cool!)

Kids love getting really close to what they are photographing. They come up with some really neat photos this way. If close-ups are routinely blurry, the photographer is too close to the subject; remind kids to stand back a bit and zoom in using the camera’s lens.

Every lens has a minimum focusing distance. If the subject is closer than this distance, the camera cannot focus the lens. You can look up the focusing range in the camera or lens manual or in quick-start guides. Depending on the shooting mode and the zoom level (from wide to telephoto), the instructions may list one or more minimum distances.

Photograph Your Life

Life events make fantastic opportunities to get kids involved in photography. They’ll have fun taking photos and will create a memorable record that can last forever.

If you are on a family trip and decide to go horseback riding, take pictures! If you go bowling, take a camera. If you’re on a vacation, take a camera. Cooking dinner? Have a camera handy. Riding in a car? Bring a camera. Painting the house? Take pictures. Having friends over for a play date? Make sure the camera battery is charged and ready to go. A friend is renting a bounce house and having a party? Take the camera! Planning an afternoon at the zoo? Take pictures!

Promote Unique Perspectives

Adults tend to want all their photos nice and level. We like vertical lines to be vertical and horizontal lines to be horizontal. Kids express themselves more freely. They tilt the camera this way and that, resulting in some pretty creative-looking photos. Don’t stamp this creative instinct out of them.

If kids need help straightening the camera, encourage them to use lines in the scene as cues. Look for doors, walls, roofs, poles, horizons, and other linear features you can line up with the edge of the frame.

Pause to Focus and Hold Still to Take the Shot

In their excitement, energetic kids can easily miss when the camera actually takes a picture. They press the shutter button and then run off to the next scene. The problem is that cameras (especially small compact-digital cameras) generally lag a moment between pressing the button and taking the photo.This is a great example of what happens when kids are in a hurry.

Encourage kids not to hurry when taking photos. They should press the shutter button halfway down, pause, confirm that the camera has successfully focused, and then continue gently pressing the shutter button all the way down. After releasing the button, they should continue holding the camera steady until they know the shot was taken.

Sprinkle Photos Liberally with Creative Effects

Some cameras have creative effects (sometimes called special effects, picture effects, or filters) that can turn ordinary photos into art pieces. Look for these types of effects: Miniature, Toy Camera, Fisheye, Super Vivid, Poster, Black-and-White, Partial Color, Soft Focus, Retro, and so on. These effects are fun to play with and they spark kids’ natural interest. I love them because the effects don’t require a computer to create, which means that kids get immediate feedback.

Make Every Shot Count

Give a kid a digital camera with an 8GB memory card that can store thousands of photos, and you will get a memory card with thousands of cats walking away, along with blurry photos of toes, the carpet, their knees, and your backside. My wife and I have discovered that if we give our kids too much leeway, they have a hard time appreciating individual photos. They are often more interested in playing “camera tag.”

While you should allow kids to have “anything goes” time, it will help if you also set times when you limit the number of photos they take to a small number, such as 5–10. The key is to sit down and review the pictures together, and then send the kid off to shoot 5–10 more. Each shot will become more meaningful to young photographers, and they will put more effort into taking them.

Discuss Every Photo

If you encourage a youngster to pick up a camera and take good photos, be available to talk when they bring their shots to you. You’re a big part of the process. Make a special effort to take the time and finish the job.

Think of yourself as a sports or activity coach working with a player to improve something (their swing, for instance). Try to find good things to make better.

This is a good example of a thought-provoking photo. Here are some questions I would ask and suggestions I would make:

  • Why did you take this photo? What made you see it from this perspective?
  • What do you like about the photo? What could you do to make it different or better?
  • Would you take this photo again? Try taking it again but from a different perspective. You can try getting lower or standing on a step. Take a step back or get closer.

Keep Critiques Positive

Children crave positive, fun, interactive feedback from adults and older kids. Make sure your critiques are uplifting and encouraging. This is not boot camp. Imagine yourself watering a plant and giving it plenty of sunshine. Kids respond in the same way. They soak up attention and love and respond by growing, maturing, and getting stronger.

Critiques don’t always have to be easy. Depending on their age and maturity, kids may need to be challenged. However, providing a challenge is not the same as berating someone for taking bad photos. Challenge older kids to excel, but reward and praise them throughout the process.

For example, you might respond to photos like the rather plain-looking doorknob in the photo by asking kids what they saw in their mind’s eye, and then discussing whether they thought they captured it. Point out aspects of the photo you like, and encourage the kids to keep trying.

Grow into Scenes and Other Shooting Modes

After kids get some experience with holding the camera, composing the scene, focusing, and taking photos using Auto mode, they will be ready to expand their horizons and begin using other shooting modes. Scene modes offer kids the best next step, in that you aren’t relying on the camera to guess what you’re photographing. Instead, you tell the camera what subject you’re photographing (and sometimes the lighting), and the camera configures the best settings to take that photo. Examples of scene settings include Portrait, Landscape, Close-up, Snow, Action, and Fireworks.

Take the Picture-a-Day Challenge

Set aside a period of time to participate in a “picture-a-day challenge” with your kids. The idea is to challenge yourself, and the kids you’re trying to teach, to take one interesting photo per day. Start off small—perhaps only a three-day span. If that approach is successful, shoot for five days. When everyone has the hang of that, go for a week or more. This type of focused assignment keeps photography on everyone’s mind. If you want to structure the challenge a bit more, assign fun subjects each day—such as animals, plants, outside, inside, toys, self-portraits, geometrical patterns. Post each day’s photos on Facebook or other online community of choice to stimulate interest and discussion.

Use Sports Mode for More Than Just Action

Normally, an adult might switch to a Sports or Action mode to photograph activities filled with movement and action. This type of mode is ideal for capturing motion. The camera sets faster shutter speeds in order to freeze movement and keep everything from looking blurry.

If kids have a tough time taking blur-free photos, the problem may be that they can’t stay still while the camera captures the photo. You can attempt to counter this problem by having them switch to Sports or Action mode, regardless of what they are photographing. With faster shutter speeds, the camera takes less time to expose the scene. The result should be sharper and less blurry.

This is a good example of using Sports mode to photograph a giraffe. The faster shutter speed (1/2000 second) helped ensure that any unexpected movement by the animal or the photographer would not blur the photo.

Encourage Projects

Encourage kids to come up with their own interesting, creative photography projects (even movies). Macro photography (extreme close-ups) is very enjoyable. So are landscape photography and portraiture. Photos make great desktop backgrounds. If kids are graphically talented, they may be able to Photoshop their own shots. Older kids might enjoy using their photos for stop-motion animation projects. Time-lapse photography can also be fun.

Print and Display Their Best Shots

One of the best ways to reward kids for their effort and achievement is to print and display examples of their best photos. The photo in below is a good example; it shows the Gateway Arch in St. Louise as photographed by one of our kids.

You will be amazed at how much encouragement kids receive by seeing their photos shown prominently. Think of this as a digital update to the tradition of hanging kids’ artwork on a refrigerator. There are a number of ways to produce these photos. You can print them yourself using a home printer and photo paper. If you want something a little better, consider professional printing—it’s not as scary or as expensive as it sounds. Frame them yourself, or go all out and have them matted and framed by an expert.

Use All Types of Cameras

There’s no reason why you can’t use other types of cameras to teach kids how to take better photos. Smartphones, tablets, digital SLRs, disposable film cameras, toy cameras, and even game pads are worth using. Kids love taking fun shots with devices like Nintendo DSi XL and iPod touch. Even something like the Barbie Photo Fashion Doll, which might seem outlandish to an adult, makes a fantastic learning tool.

Rinse and Repeat

Regardless of how quickly we learn, a reasonable amount of repetition helps anything to become familiar. Up to a point, the more kids engage in fun photography activities, the more they will master the craft. Holding the camera, composing the scene, focusing, and taking the shot will become second nature to them.

You’ll be amazed by the photos kids take. Their perspective differs from that of adults. Some photos will be funny, others will be charming. Some very artistic, others practical.

Notice that I’ve said “reasonable” and “up to a point.” Don’t overdo it. Pay attention to signals kids give off. You want them to be excited, encouraged, and wanting more.

Final Thoughts

Kids and photography go together. I’m amazed by the photos my kids take. Their shots range from fun, lighthearted snapshots of good times at the zoo to more purposefully artistic studies.

Having the right attitude and expectations (on my part, mostly), combined with a creative teaching style, has enabled me to help my kids take good photos and have fun. Use the tips and techniques I’ve shared in this article to help you get started.

Above all, encourage kids lovingly—and know when to quit. Guide, but don’t force. Make the time you spend taking photos together fun. Some kids will give photography a try, but will eventually find something else that interests them more. That’s okay. Others will fall in love with photography and will want to pursue it more and more on their own. You may have to work hard to keep up with them!

Effect of Booster Seat Design on Children’s Choice of Seating Positions During Naturalistic Riding

The purpose of this naturalistic study was to investigate the effect of booster seat design on the choice of children’s seating positions during naturalistic riding. Data was collected through observations of children during in-vehicle riding by means of a film camera. The children were positioned in high back boosters in the rear seat while a parent drove the car. The study included two different booster designs: one with large head and torso side supports, and one with small head side supports and no torso side supports. Six children between three and six years of age participated in the study. Each child was observed in both boosters. The duration of the seating positions that each child assumed was quantified. The design with large side head supports resulted more often in seating positions without head and shoulder contact with the booster’s back. There was shoulder-to-booster back contact during an average of 45% of riding time in the seat with the large head side supports compared to 75% in the seat with the small head supports. The children in the study were seated with the head in front of the front edge of the head side supports more than half the time, in both boosters. Laterally, the children were almost constantly positioned between the side supports of the booster in both seats. The observed seating positions probably reduce the desired protective effect by the side supports in side impact, and may increase the probability of head impact with the vehicle interior in frontal impact.

Car Seat Position

Go to:

INTRODUCTION

Motor vehicle crashes are among the leading causes of morbidity and mortality in children 4 to 8 years of age [Bingham, Eby, Hockanson, et al., 2006; Subramanian, 2005]. A child’s safety is dependent on the adult’s choice of vehicle and child restraint. It is of utmost importance that children use correct restraints when seated in a vehicle, taking into consideration age, height, and weight. Belt-positioning boosters (BPB) are effective tools to help protect children from injuries, decreasing the probability of injury by as much as 45% compared to safety belt only [Arbogast, Jermakian, Kallan et al., 2009]. Durbin, Elliot and Winston (2003) have shown that seat belt syndrome related injuries to the abdomen and spine were nearly eliminated in crashes with children seated correctly on belt-positioning boosters compared to those restrained by safety belts alone.

Backless BPBs were introduced in Sweden in 1978. At that time, they were intended for use by 3 to 7-year-olds in combination with the vehicles’ safety belts. A few years later, the first high back BPB was introduced. Since then, the usage rate of backless and high back BPBs has increased. In the US, BPB use in the 4 to 8-year age group has increased from 15% to 63% between 1999 and 2007 [Partners for Child Safety Fact and Trend report, 2008].

The backs of the high back BPBs were initially intended to route the diagonal part of the safety belt in an optimal position over the child’s shoulder and chest. In recent years, the designs of the backs of the BPB have evolved towards large side supports both at the height of the torso and the head. The child restraint manufacturers emphasized two reasons for this; to provide improved side impact protection and to provide comfort for children by keeping them upright when relaxed or asleep to help provide protection at all times.

However, high back BPB with large side supports achieve the desired effect only if the child, particularly the child’s head, is contained within the BPB. Previous research on behavior in child restraint systems (CRS) has investigated the way in which children in the age group 0 to 8 years change their position, both within and outside the CRS [Charlton, 2010]. It is known from other research fields that sitting is not static; both children and adults vary their seating position and posture [Bentsen, 1971]. There are a number of reasons for this. For children, one reason is that their natural physical and mental development is achieved through movement, thought, contact with others, and sensing and experiencing their surroundings [Bentsen, 1971]. Children nearly always use several senses simultaneously to experience the environment; i.e. the visual, audile and haptic senses. Therefore, they are prone to change positions to be able to see, hear and touch at the same time. Another reason is that they may experience discomfort sooner than adults due to differences in the nervous system. Loading or pressure on body parts may be perceived earlier by younger children than older children and adults [MacGregor, 2008]. Furthermore, there is a gradual development of the muscles from birth to adulthood. The proportion of muscles in total body weight is smaller for a child compared to an adult. As a result, children feel fatigue earlier than adults and need to vary their seating position more often [Bentsen, 1971]. Also, to compensate for their relatively smaller amount of muscles children use their legs and feet for support while sitting rather than the seat back to stabilize the back [Bentsen, 1971].

The sitting position depends on which positions are possible in a specific seat. The children’s ability to move depends on the design of the restraint system [Meissner, Stephens and Alfredson, 1994; van Rooij, Harkema, de Lange et al., 2005]. The design may promote a range of sitting positions, including less optimal positions. Research by Charlton et al. [Charlton, 2010] has provided a first understanding of how children sit in vehicles. However, there is limited knowledge of how the size of the side supports influences seating position. The purpose of this study was to investigate the effect of high back belt-positioning booster design on the choice of children’s seating position during naturalistic riding. Specifically, the head and torso positions in sagittal (fore-aft) and lateral (left-right) directions were studied together with the orientation of the face and gaze.
Go to:

METHODS

In order to increase the understanding of the natural sitting behavior of children during a car ride, a small naturalistic study was conducted to identify common seating positions. Six children between 3 and 6 years of age were observed. The children were recruited from a daycare center. The children were positioned in high back BPBs in the rear right seat of a car. Two markedly different BPBs were chosen. Both seats had adjustable headrests with multiple height positions. Also, the angle between the back and the cushion was adjustable, allowing contact with both the cushion and the seat back of the car. Seat X had small side supports for the head and no torso side supports, while seat Y had large head and torso side supports (Figure 1). The depths of the head side supports were 10.5 cm for seat X and 20 cm for seat Y. Seat X was developed in the late 1980s and the side supports were intended to support the head when resting and sleeping. Seat Y represents a typical modern high back BPB available in stores today. Seat Y is promoted as a high back BPB with side impact protection.
An external file that holds a picture, illustration, etc. Object name is file57-finalf1.jpg
Figure 1

Seat X to the left and seat Y to the right.

The cars used in the field tests belonged to the children’s families and were driven by a parent. Each child was taken for a ride with a duration of 40 to 50 minutes in each of the two BPBs. The route entailed both city and highway driving. The two rides occurred on different days, but at the same time of day and on the same route each time. The test order of the seats was alternated equally. Each car was equipped with a digital video camera. The camera was attached to the inner roof on the left side of the car, providing a side view of the child (see snapshots from the films in Figure 3).
An external file that holds a picture, illustration, etc. Object name is file57-finalf3.jpg
Open in a separate window
Figure 3

a) and b) seating position AA in seats X and Y – entire back and head in contact; c) and d) seating position AB in seats X and Y – entire back in contact and head in upright position; e) and f) seating position BB in seats X and Y – shoulder not in contact and head in upright position.

Data was collected in two ways; continuous film observations of children during the ride. From the films, the children’s seating positions were categorized and the duration of each sitting position was quantified. Also, the children’s different behavior and actions during the ride were documented. However, the comfort parameter seat stiffness was not measured.
Classification of seating positions

The children’s seating positions were systematized by differentiating the sagittal (fore-aft) from the lateral seating positions (left to right). To design a usable classification system, a number of head and torso positions in the x and y directions were defined. Arm and leg positions were not observed.

The sagittal torso positions were defined as: (A) the entire back including shoulders against the BPB back, (B) the entire back but not the shoulders against the BPB back, (C) child remains upright but no part of the back against the BPB back, and (D) the torso is leaning forward without contact with the BPB back. The sagittal head positions were: (A) head against the BPB back, (B) head upright relative to the torso, and (C) head leaning forward relative to the torso. These head and torso positions were combined to make up the sagittal seating positions as shown in Table 1. For example, in the AB position the child sits with the entire back against the BPB back, while the head is upright. The classification was derived from seating posture categories defined by Utriainen, Dahlman and Osvalder (2003).

The lateral seating positions were combined in the same way as the sagittal positions. The lateral torso positions were defined as: (a) the whole torso is within the BPB back, (b) one shoulder is outside the BPB back, and (c) one shoulder and part of or the whole thorax is outside the BPB back. The lateral head positions were: (a) between the head side supports, (b) resting against one of the head side supports, (c) partly outside the head side supports, and (d) completely outside the head side supports. The combinations of the lateral torso and head positions are shown in Table 2. In the results, the direction of the lateral movement is indicated by plus (+) meaning inboard, and by minus (−) meaning towards the side window. The face and gaze orientations were defined by five categories; forward, right, left, down or other.
Table 2

Definitions of the lateral seating positions. No arms or legs were drawn; the horizontal line shows shoulder width.
Head a Head b Head c Head d
Torso a An external file that holds a picture, illustration, etc. Object name is file57-finali11.jpgaa An external file that holds a picture, illustration, etc. Object name is file57-finali12.jpgab An external file that holds a picture, illustration, etc. Object name is file57-finali13.jpgac N/A
Torso b An external file that holds a picture, illustration, etc. Object name is file57-finali14.jpgba An external file that holds a picture, illustration, etc. Object name is file57-finali15.jpgbb An external file that holds a picture, illustration, etc. Object name is file57-finali16.jpgbc An external file that holds a picture, illustration, etc. Object name is file57-finali17.jpgbd
Torso c N/A N/A An external file that holds a picture, illustration, etc. Object name is file57-finali18.jpgcc An external file that holds a picture, illustration, etc. Object name is file57-finali19.jpgcd
Open in a separate window

Two persons conducted the film analysis by analyzing three children each. Parts of the films were analyzed jointly and the analyses were partly repeated for quality confirmation. Any seating position with duration of one second or longer was assessed and categorized according to the defined seating positions (Table 1 and Table 2).

The total duration of each position was summed up. Ultimately, the sagittal seating positions where the entire back or the head was in contact with the BPB back (AA, AB, AC and BA) were grouped and the duration of these seating positions were summed up by child and seat type. The duration of each seating position was assumed to be normally distributed. A paired t-test was conducted to show if the durations of the AA, AB, AC and BA positions in seat X minus the corresponding durations in seat Y were significantly greater than zero. If so, there was a significant difference between the two seats.
Go to:
RESULTS

The ages of the six participating children (two males and four females) are shown in Table 3. Most of the children were accompanied by passengers besides the driver (Table 3). The children were numbered by age.
Table 3

Demographics of the participants in the study.
No Gender Age (y) Length/sitting height (cm) Seat back angle (°) Seat X/Y Seat cushion angle (°) Seat X/Y Other passengers
1 F 3 102/58 75/74 25/20 Infant: infant seat; rear left.
2 M 3 94/53 69/70 27/16 Child: BPB, rear left. Infant: rear facing seat, rear center.
3 F 4 112/61 65/71 26/20 Adult: front passenger seat.
4 F 5 115/64 66/68 29/27 Toddler: CRS, rear left.
5 F 5 123/66 68/65 29/20 None.
6 M 6 114/59 75/80 24/15 None.

The total duration of each seating position is presented as a percentage of the total riding duration. Figure 2, Figure 4 and Figure 5 show the averages of all children and confidence intervals (95%). The detailed data are shown in Appendix 1 to Appendix 4.

Open in a separate window
Figure 2

The distribution of sagittal seating position durations, shown as a percentage of the total ride duration. The averages of all children are presented by BPB seat type with corresponding confidence intervals (95%). The sagittal seating positions are defined in Table 1.

Figure 4

The distribution of lateral seating position durations shown as a percentage of the total ride duration. The averages of all children are presented by BPB seat type with corresponding confidence intervals (95%). The lateral seating positions are defined in Table 2. The plus indicates inboard, the minus indicates toward the side window.

Figure 5

The distribution of face and gaze orientation durations shown as a percentage of the total ride duration. The averages of all children are presented by BPB seat type with corresponding confidence intervals (95%).
Sagittal seating position

The averages of the children’s sagittal seating position durations are shown in Figure 2 and the distributions of the sagittal positions by child are shown in Appendix 1. In general, the most common seating positions in seat X were those with the entire back or head in contact with the BPB back (AA, BA, AB and AC, Figure 2). In seat Y, the most common seating positions were those with the head in an upright or forward leaning position and the back with complete or partial back contact (AB, AC, BB, or BC, Figure 2). The duration of the A torso positions (AA, AB and AC), i.e. with the entire back in contact with the BPB back and the head in any position, comprised an average of 75% of the total duration in seat X. The corresponding figure for seat Y was 45% (Appendix 1). More specifically, the two most common sagittal seating positions in seat X were AA and AB, both adding up to 72% (definitions in Table 1, data in Appendix 1). Notably, the two oldest children, numbers 5 and 6, had proportionally longer durations in the AA seating positions. In seat Y, the two most common positions were AB and BB, adding up to 64%. Some of the seating positions are illustrated in Figure 3.

Furthermore, the durations of the seating positions AA, AB, AC and BA were an average of 32% greater in seat X compared to seat Y (P=0.05). The two samples were tested for normality using both the Kolmogorov-Smirnov and Anderson-Darling tests. Neither of the tests were significant at the alpha=0.05 level, thus indicating that the data were drawn from normal distributions (P_X,KS=0.12, P_X,AD=0.098, P_Y,KS=0.15, P_Y,AD=0.25).

The positions without torso contact with the seat back (torso position C and D) were rare in both of the seats; 4% in seat X and 11% in seat Y (Figure 2). These positions were initiated by specific activities such as reaching for something, looking out the windscreen or communicating with someone.

On average, the head was in contact with the BPB back 33% of the time in seat X, and 11% in seat Y (Figure 3a and b). Most commonly, the head was in an upright position (head position B, Figure 3c, d, e and f): 59% of the time for seat X and 75% for seat Y. The head was leaning forward (head position C) for 8 – 13% of the time and this position was often associated with activities such as reading, playing with something, looking at something in the lap or beside, and eating. The children usually took this position to look down, except for child 3. He sat like this in the Y seat while looking left or right.
Lateral seating position

The lateral position aa with the torso within the BPB and the head within the side supports was the most common lateral seating position, with 85% of the time in seat X and 77% in seat Y (Figure 4). The position with the head contacting the side supports was the second most common position; with 12% for seat X and 17% for seat Y. Three children had a greater proportion of the head contacting the right support vs. the left support. All were tired and rested in this position, either by leaning the side of the head or the back of the head towards the head side support. The one child that spent 20% (Appendix 3) of the time with the head against the left side support in seat X did this to rest in a position where the safety belt did not rub on the skin of her neck. She frequently moved the belt from her neck or put her hand under the safety belt for protection.

Positions with the torso partly or completely outside the BPB together with the head partly or completely outside the side supports were uncommon. They seldom occurred and had short duration
Orientation of the face and gaze direction

The face and gaze direction was similar in the two seat designs (Figure 5). About half the time, the children looked forward, followed by looking right about a fourth of the time. The children looked either left or right on an average of 35 to 43% of the time. The children looked down for 14 to 21% of the time, and this position was associated with activities such as reading, eating, playing with a toy etc.
Go to:
DISCUSSION

This study was designed to investigate the effect of the high back BPB design on the choice of seating position of children during naturalistic car riding.
Seating positions

The most striking difference in sagittal seating positions between the two BPBs was that the six children spent an average of 75% of the time with their entire backs against the BPB back in the seat with small side supports, but only 45% in the seat with large side supports. The position with the entire back and head against the BPB back (position AA, Figure 3a and b) was three times more common in the seat with small side supports. The positions without shoulder and head contact (BB and BC) were more than twice as common in seat Y. The difference between the two seats was statistically significant (P=0.03) for the group of seating positions with most BPB back contact (AA, AB, AC and BA). A plausible reason is that the head side supports in seat X did not obstruct visibility even in the position with torso, shoulder and head against the BPB back, while the children needed to be at least in a head upright position to achieve equal visibility in the seat with large side supports (Figure 3d and f). However, the results of the study showed that the children looked left or right slightly less in the Y seat. It may be that the head side supports worked as blinders, preventing the temptation to look sideways. Looking left or right was associated with many different sagittal seating positions, but the positions with the head in contact with the BPB back were rare with the Y design (Appendix 2). The looking left or right activity was one of the most common activities (34 to 43%) and should be considered a normal position (Figure 3).

During the second half of each ride, there were noticeable signs of tiredness or discomfort for most of the children in both seat designs. Common signs were to take an upright position without seat back contact (C) or a forward leaning torso position (D), to support the upper body with the arms (hands on belt guides, elbows on side supports, or elbows on legs), to more frequently change the seating position or to “readjust”, i.e. to briefly move about and then return to the initial position. These findings are in line with the theory by Bentsen (1971), which states that children vary their seating positions often to avoid tiring the muscles and use legs and feet to support themselves while sitting. Based on the knowledge of children’s physical development and sitting behavior, it can be assumed that the adequate type of sitting support is age dependent, i.e. younger children need more support than older. The data suggests that rides with duration of more than 15 to 20 minutes require additional comfort features than the two studied seats offered.

Fortunately, the extreme seating positions were unusual in both seats and did not seem to be related to the design of the side supports. On the contrary, they were related either to a specific activity of the child or to discomfort. Discomfort may be related to parameters in the seat designs, e.g. the seat stiffness or seat angles. The seat stiffness was not measured in this study, but the foam layer on seat X was thinner than the foam layer of seat Y, suggesting that the children should experience discomfort sooner in seat X. The booster back angles correlated with the car seat back angles and the average difference in back angle between seat X and Y for one child was 2.7 degrees. Such small angle differences may be hard to perceive. However, the cushion angle differed 7 degrees on average. The cushion angle was always greater for seat X. This may have contributed to the difference in seating positions between the two seats.

All children spent the majority (80%) of the time in the torso and head mid lateral position in both seats.

This position was the most common when the children were alert, either looking down or forward, which they did about 60% of the time. The next two most common lateral seating positions were ab+ and ab–, i.e. with the child resting its head against the head side supports. This seating position was most commonly chosen for rest. The two children with longest duration in the ab positions were tired and resting, but did not fall asleep (eyes closed only short periods). Even the small head side supports seemed to give the children adequate support for rest when awake; the head position was stable while leaning against the supports, but further studies are needed to determine an optimal head support size. However, there was one notable difference in the duration with head resting against the side supports (ab positions) between the X and Y seats. The outboard head side support was more frequently used on the Y seat. It was not clear whether the children preferred the extra support given by the head side support, or if the contact between the head and the support was just a result of the head position that was chosen because of the desire to look out the window.

In general, the lateral movements outside of the side supports were short and temporary. Often, these movements were associated with communication, either with the driver or with the adjacent occupant, or achieving a better view. Child nr. 6 – the oldest child – spent 18% of the time leaning inboard to look out through the windscreen (the view was otherwise obstructed by the front seat) and to talk to the driver. This behavior did not seem to be primarily related to the seat design, and could be expected to occur with either of the two designs. On the other hand, the large side and head supports of the seat supported the leaning posture. The supports may thus have enticed the child to take this posture as well as enabled long duration of the posture. Other reasons for the positions outside the side supports were to reach something on the floor or on the seat beside the child or to play, for example, by swinging from side to side. There was no difference in the time spent in the extreme lateral position between the seats; even in the seat with the large side supports, the children were able to make substantial lateral movements, which was unexpected. It is important to note that none of the children in the study fell asleep during the rides. It is possible that there is a difference in lateral seating position between the two seat designs for sleeping children.

The study showed that the seating position was influenced by the activity the child carried out. Often, the children came up with something to do when not resting. Activities were: talking with the driver, reading, playing with toys or something similar, looking out, eating or drinking, or playing with a sibling. None of the children watched DVDs or played games. Since this was a naturalistic study, there were no restrictions for the activities. A greater sample would decrease any bias of the actual activities chosen by the children in the study. Although there were differences in the duration of the different activities in the two seats, it appeared that the activity the children chose was independent of the seat. However, how the activity was performed may have differed, e.g. looking out left or right was not possible with the head against the BPB back with the large head side supports. Other activities, such as eating or playing, could be performed in the same seating positions in either seat.
Shoulder belt position

The shoulder belt position was not studied specifically, but there were observations in the study of shoulder belt misuse and shoulder belt discomfort. For example, the lateral inboard and/or forward movement occasionally resulted in a shoulder belt routed under the arm. In some cases, the children adjusted the belt back in position, but in other cases, the belt stayed under the arm until the driver noticed and asked for correction. The misuse durations varied between 2 and 21 minutes (until the ride ended).

Another child experienced discomfort from the shoulder belt. She stated that it made her neck hurt and she intentionally pulled the belt away from her neck several times during the ride. This child had three strategies to avoid discomfort: moving the torso and neck away from the safety belt, moving the safety belt away from the neck, or placing the hand in between the safety belt and neck. The first strategy thus affected the lateral seating position, resulting in head contact with the left or right side support in 42% of the ride. A third child also experienced discomfort to the neck from the shoulder belt. She put her hand under the belt on several occasions or put her toy between the shoulder and the belt.
Safety implications of the seating positions

We hypothesize that some of the observed seating positions may result in less effective crash protection. The children generally adopted seating positions that resulted in head positions further forward in the seat with large head side supports, compared to the seat with small head side supports. The protective effect of the head side support in side impact is negligible when the head is positioned in front of it, which was the case 52% of the time in the seat with large side supports. As a comparison, the standard anthropomorphic test device (ATD) position is comparable to the AB seating position (FMVSS 213). The forward positions also decreased the residual distance to vehicle interior surfaces in front of the child, potentially increasing the risk of head impact in frontal crashes. The identified forward positions of children’s heads compared to the ATD’s are in line with the findings of a study on rear-seated adults’ head positions relative to adult ATDs [Reed, Ebert-Hamilton and Schneider, 2005].

A large proportion of side impacts are angled [Arbogast, Ghati, Menon et al., 2005], resulting in occupant kinematics with a forward component added to the lateral kinematics. Henary, Sherwood, Crandall et al. (2007) showed 5 times higher efficacy of rearward sitting children compared to forward sitting children in side impacts. This difference was explained by the kinematics during the crash, where the forward component in the side impact would cause the forward facing child to move forward, out of the side supports. These kinematics, coupled with the child’s initial head position partly in front of the side supports, suggest that the additional protection by the side supports in an angled side impact is likely to be marginal.

These theories are supported by the findings of Arbogast et al. (2009). In their study, they could not detect any difference in injury risk between children (4 to 8 years) seated in a backless BPB compared to high back BPB in frontal and side impacts. The crashes occurred between 1998 and 2007 in vehicle model years 1990 or newer. This shows a need to differently design safety systems that provide head protection and that are more robust under a diverse set of seating postures and crash conditions.
Study design

This study could be regarded as a pilot study to increase the knowledge about children’s natural sitting behavior during everyday car rides, by identifying common seating positions. In the study, the children traveled in their own cars, driven by a parent. The film camera was positioned so that the children paid no attention to it. The ride duration was long enough for the children to become accustomed to the new BPB and thereby act in a more relaxed and natural way. The two rides occurred on different days, but at the same time of day to minimize variation in e.g. tiredness. It should be noted that the children with siblings were accompanied by the siblings on both rides. The study only comprised six children and no repeats were made. Six subjects were considered sufficient to provide increased knowledge and demonstrate common sitting behaviors. Due to the limited sample size, however, the extremes may not have been covered. According to theory about user studies, a sample size of six users covers nearly 70% of possible problems and behaviors [Nielsen, 1993].
Limitations

BPBs are intended for use by children from 3 up to 12 years of age. The European regulation stipulates a stature of 135 or 150 cm before the safety belt alone is allowed. In Sweden, BPBs are recommended up to an age of 10 to 12 years, while NHTSA’s recommendation for the US is 8 years. The current study only included 3 to 6-year old children, which corresponds to the smallest range for booster seats. It is possible that seating behavior of older children is different than observed in this study; the two oldest children in the study showed a slightly different behavior than the younger ones. Specifically, they maintained a more upright seating position for longer periods of time, which is in line with the theory of child development [Bentsen, 1971]. Still, it is reasonable to believe that some identified seating positions are relevant for the older age groups. For example, the older children would also need to move the head forward from the head side support to see out through the side window or to see, touch, talk to or hear the adjacent person in the car. However, these assumptions should be confirmed in a study involving older children.

The limitation of one film camera view resulted in limited direct visual confirmation of the lateral head and torso positions in the outboard direction. At times, the position had to be deduced by other indicators, e.g. movement of the head relative to the seat back indicated no contact (the BPB and child were in more or less constant motion due to road unevenness). Thus, the lateral seating position with head against the right side support (ab–) was hard to discriminate from head position between the side supports (aa), and may be underreported in the study.

The lack of means to take continuous numerical measurements of the head and torso positions in all three dimensions resulted in less detailed quantitative information on body positions. Further, the study lacks a formal evaluation of inter-observer reliability between the two observers.

Go to:

CONCLUSION

The design of the side supports of BPB influences the child’s seating posture. The time spent sitting with the entire back against the BPB back was nearly halved in the seat with large side supports compared with the seat with small side supports (45% vs. 75%). All in all, the children in the study were seated with the main part of the head in front of the front edge of the head side supports more than half the time, i.e. positioned forward to the standard crash dummy position. This finding applied to both of the seat designs.

Laterally, the children were almost constantly positioned between the side supports of the BPB in both seats; there was no difference due to seat design. Further, the extreme sagittal and lateral positions were limited in duration and independent of seat design. Nor did the face and gaze direction appear to be dependent on BPB design.

An Introduction to Baby Car Seats

An Introduction to Child Car Seats

Becoming a parent for the first time includes a substantial quantity of learning, as there are hundreds of things included which childless individuals will have had no reason to discover previously, nor had any incentive to learn about. When you first learn of the upcoming new arrival, your ideas will probably be taken up with designing and equipping a nursery, buying clothing, bottles, and far more, however lots of people don’t think about an infant safety seat up until later in the pregnancy. It’s extremely important to make sure you know exactly what to try to find in a seat, as after all, you’ll need one on your child’s first journey, from the health center back to home.

For this first journey, you’ll need a seat which deals with towards the rear of your car. This offers the very best security in the event of an impact for a baby who is unable yet to support the weight of their own head. The seat will be nicely reclined backwards, offering a safe and comfy coccoon for your baby.

It’s crucial to choose a rear-facing seat which is dependable and strong, yet light to bring. Young babies sleep a little and frequently, and the last thing you want to do after lastly getting your kid to oversleep a cars and truck journey is to wake them by removing them from their cosy and warm seat. Having an easily detachable model which is light to bring ways you can shuttle your child from cars and truck to house with as little disruption as possible.

These rear dealing with seats are only appropriate for more youthful babies. Once they’ve grown to weigh around 20 pounds, or the top of their head is nearing the upper edge of the seat and thus not protected correctly, you’ll have to relocate to a forward facing seat.

These seats are a lot more upright, but much better designs can be gotten used to offer a more horizontal position to help your young child sleep during longer journeys. It’s important that your kid is able to sit up on their own before utilizing this kind of seat because of the upright position. Forward facing seats are constructed to last for a reasonable couple of years, and the majority of will ready till your kid reaches the age of 4 or 6.

Before we complete, there are two exceptionally crucial things to remember when purchasing a car seat.

It may seem like an economy to get a 2nd hand seat, there’s no method of knowing for sure its history. You need to only purchase a used seat when you can be definitely sure of the history – such as when purchasing off close good friends or family.

Lastly, child safety seat should not be suited front seats where an air bag is fitted. In an accident, the inflation of the air bag might trigger major injury or suffocation to a child, so always healthy safety seat in the back of the vehicle in this case.

When you initially learn of the upcoming brand-new arrival, your ideas will probably be taken up with designing and equipping a nursery, buying clothes, bottles, and much more, however lots of people do not believe of an infant car seat up until later on in the pregnancy. It’s extremely essential to make sure you understand what to look for in a seat, as after all, you’ll need one on your infant’s really first journey, from the hospital back to house.

The seat will be perfectly reclined in reverse, offering a comfy and safe coccoon for your child.

Young babies sleep a little and frequently, and the last thing you want to do after lastly getting your kid to sleep in an automobile journey is to wake them by removing them from their warm and cosy seat.

Children Portrait Photography Ideas

If one wants to achieve real and definite emotions, then kids photography is the best subject to work on. It’s a very warm feeling, capturing all those innocent and authentic clicks. The joy of childhood beautifies the pictures. But to capture all these pictures, dealing with kids is a cumbersome program. It’s a real hard work dealing with cranky kids. One needs to have patience while going for children portrait photography. Also one should be prepared enough that kids may have their own thoughts that they may showcase through their expressions.

Shoot from the Eye Level: While one is shooting kids, he should be aware that the shoot should start from the eye level, as it gives good captured clicks. They should always capture their natural and real expressions, as kids are quite creative and likes to move in their own swing. Try to get all the sweet poses while lying on the ground as to have that cuteness captured in the camera.

Different Angles: A good photographer is one who always looks for different angles in photography. When the subject is kid’s portrait photography, viewer’s starts searching for new and innovative angles, as they don’t want to have any harmony pictures. Hence, the photographer should make it a point to not to have any symmetry in the clicks. If one gives some space to kids to express their expressions, he can build up a good portfolio.

Infrastructure Set Up: A good photographer always set up his background or the set with some juvenile theme in mind while the photography is happening for kids. So that kids enjoy while they are being shot and give the best joyous expressions to be captured. This juvenile theme not only makes work easier for the photographer, but also helps the assistant to handle the children with ease and light care.

Make Sure Kids are Relaxed: Best shoot can only take place while the kids are in the relaxed state. Some candies, toys, hugs, and sweet attitude can really work well with kids while they are on the shoot. Cranky kid spoils the shoot and the money involved. Therefore, all these things should be cared by the photographer while setting up the set. Once the kids are relaxed they goes on with their own flow leaving good captures behind.

Everyday Environment Clicks: Some pictures can be clicked from the daily routine of the kids, while they are doing painting or while they are sleeping, or studying. These clicks definitely takes up a lot of time, as the photographer has to wait for the kid for performing that particular activity, but as well, said slow and steady wins the race, the output that is released is beautiful, as it is a collection of all activities that a kid performs.

Children’s portrait photography is good if a photographer starts thinking from a kid’s point of view, by providing the comfort that a kid want in order to achieve creative captures.


Children Portrait Poses And Picture Ideas

Try taking pictures of kids in their everyday environment, for example, playing their favorite games, doing homework or as in this example, painting with watercolors. Keeping them busy in a familiar setting is a good way to get them to cooperate and to make those special poses you want. Posing your subject can be intimidating but it’s a crucial element in getting the best photo possible. From kids to families to adults.